Installation process for Woocommerce Plugin
How to install Hero Gateway Payment plugin for Woocommerce
Step 1: Download and Install Plugin
-
Download the Plugin by clicking this link: download WooCommerce plugin.
-
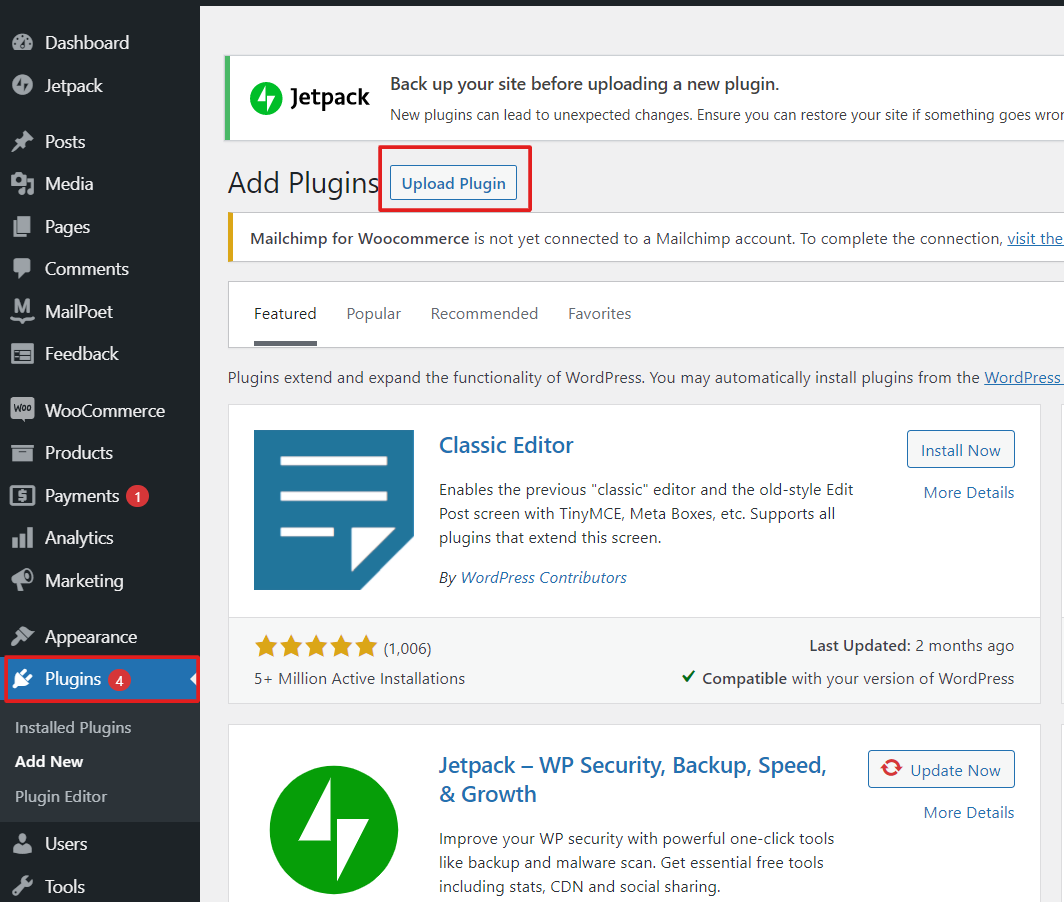
Go to Plugins / Add new and click on the Upload Plugin button
-
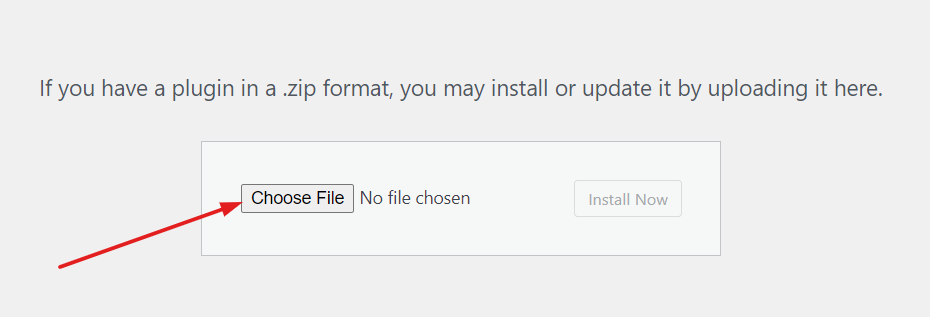
Choose a Plugin .zip file that you just downloaded
-
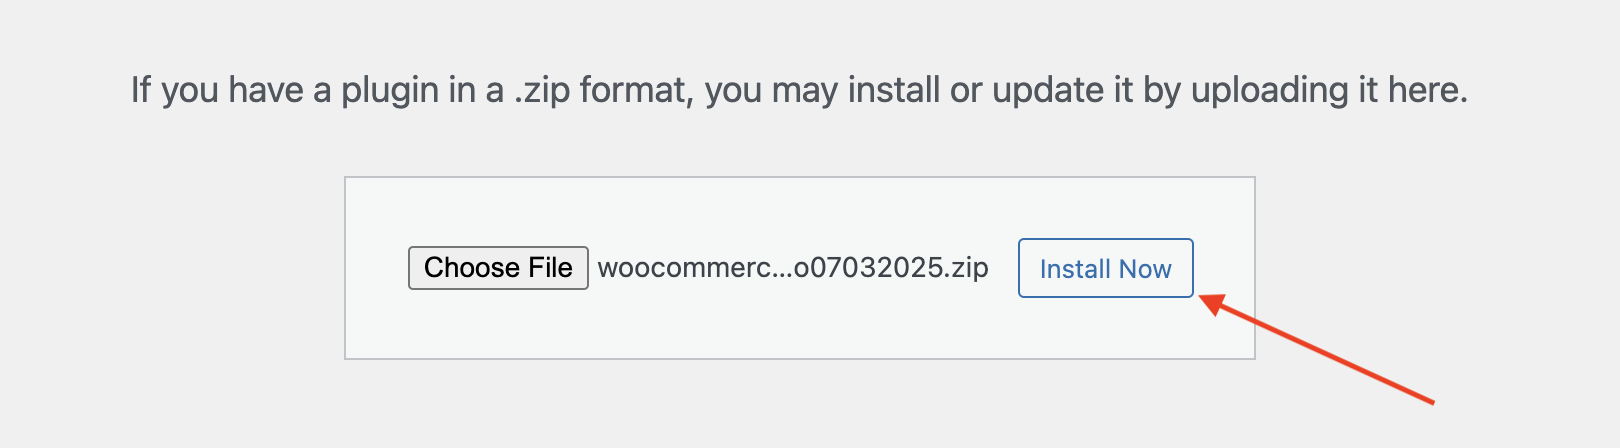
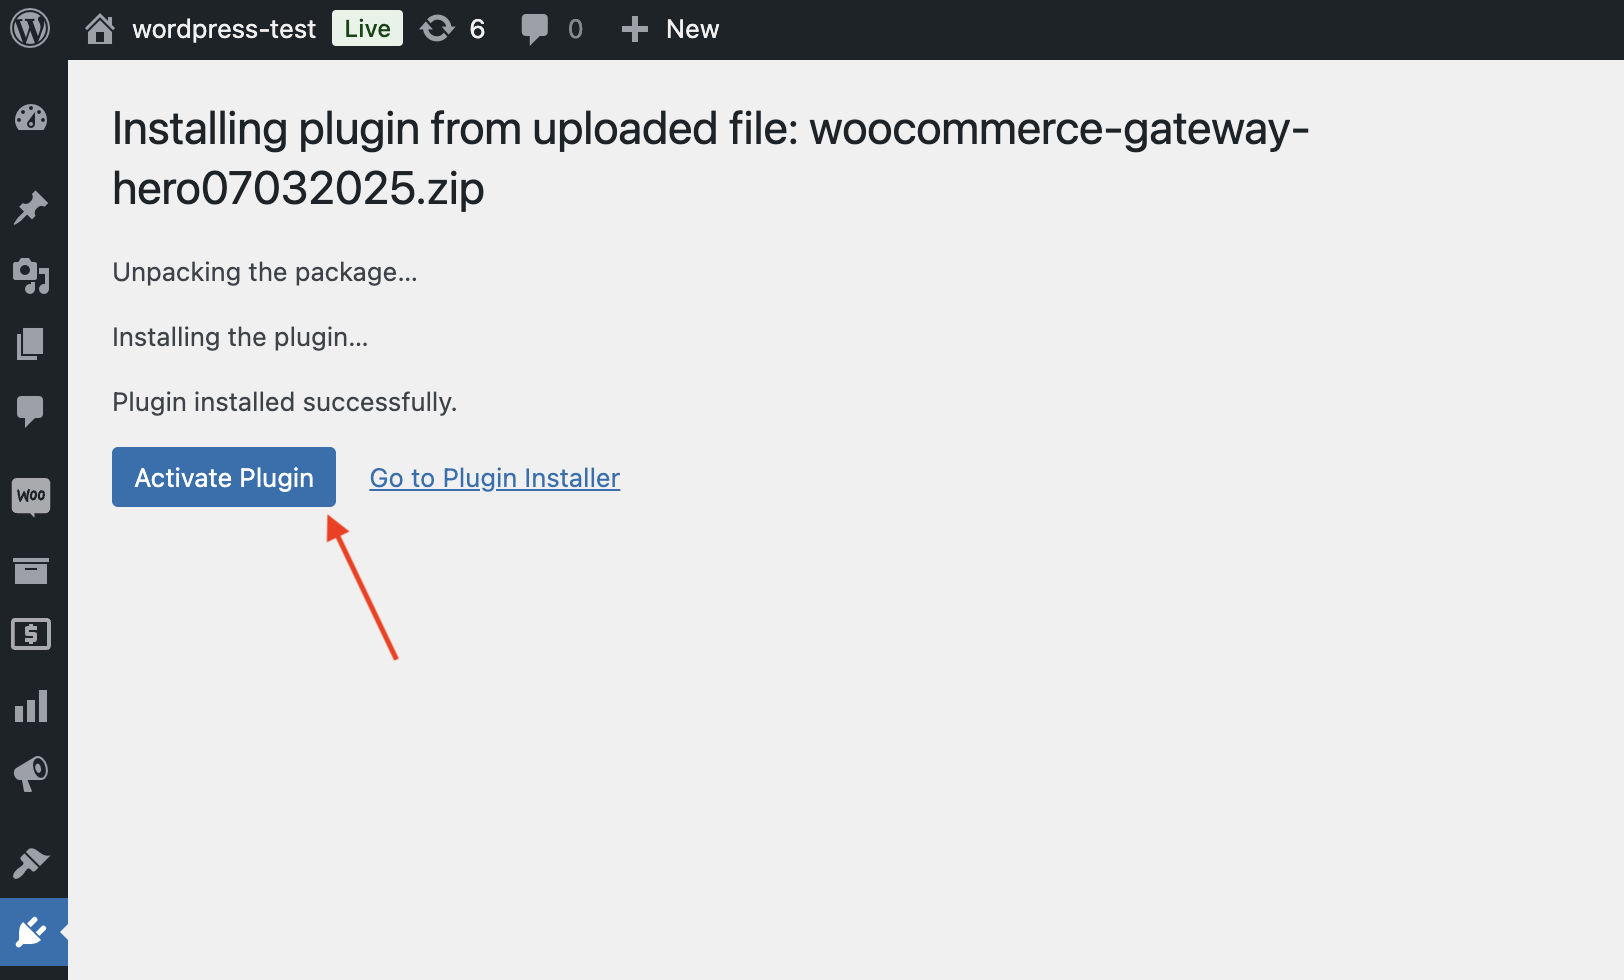
Click on Install Now to start Hero Woocommerce plugin integration. Once the installation is finished click on Activate Plugin
Step 2: Configure the Plugin
-
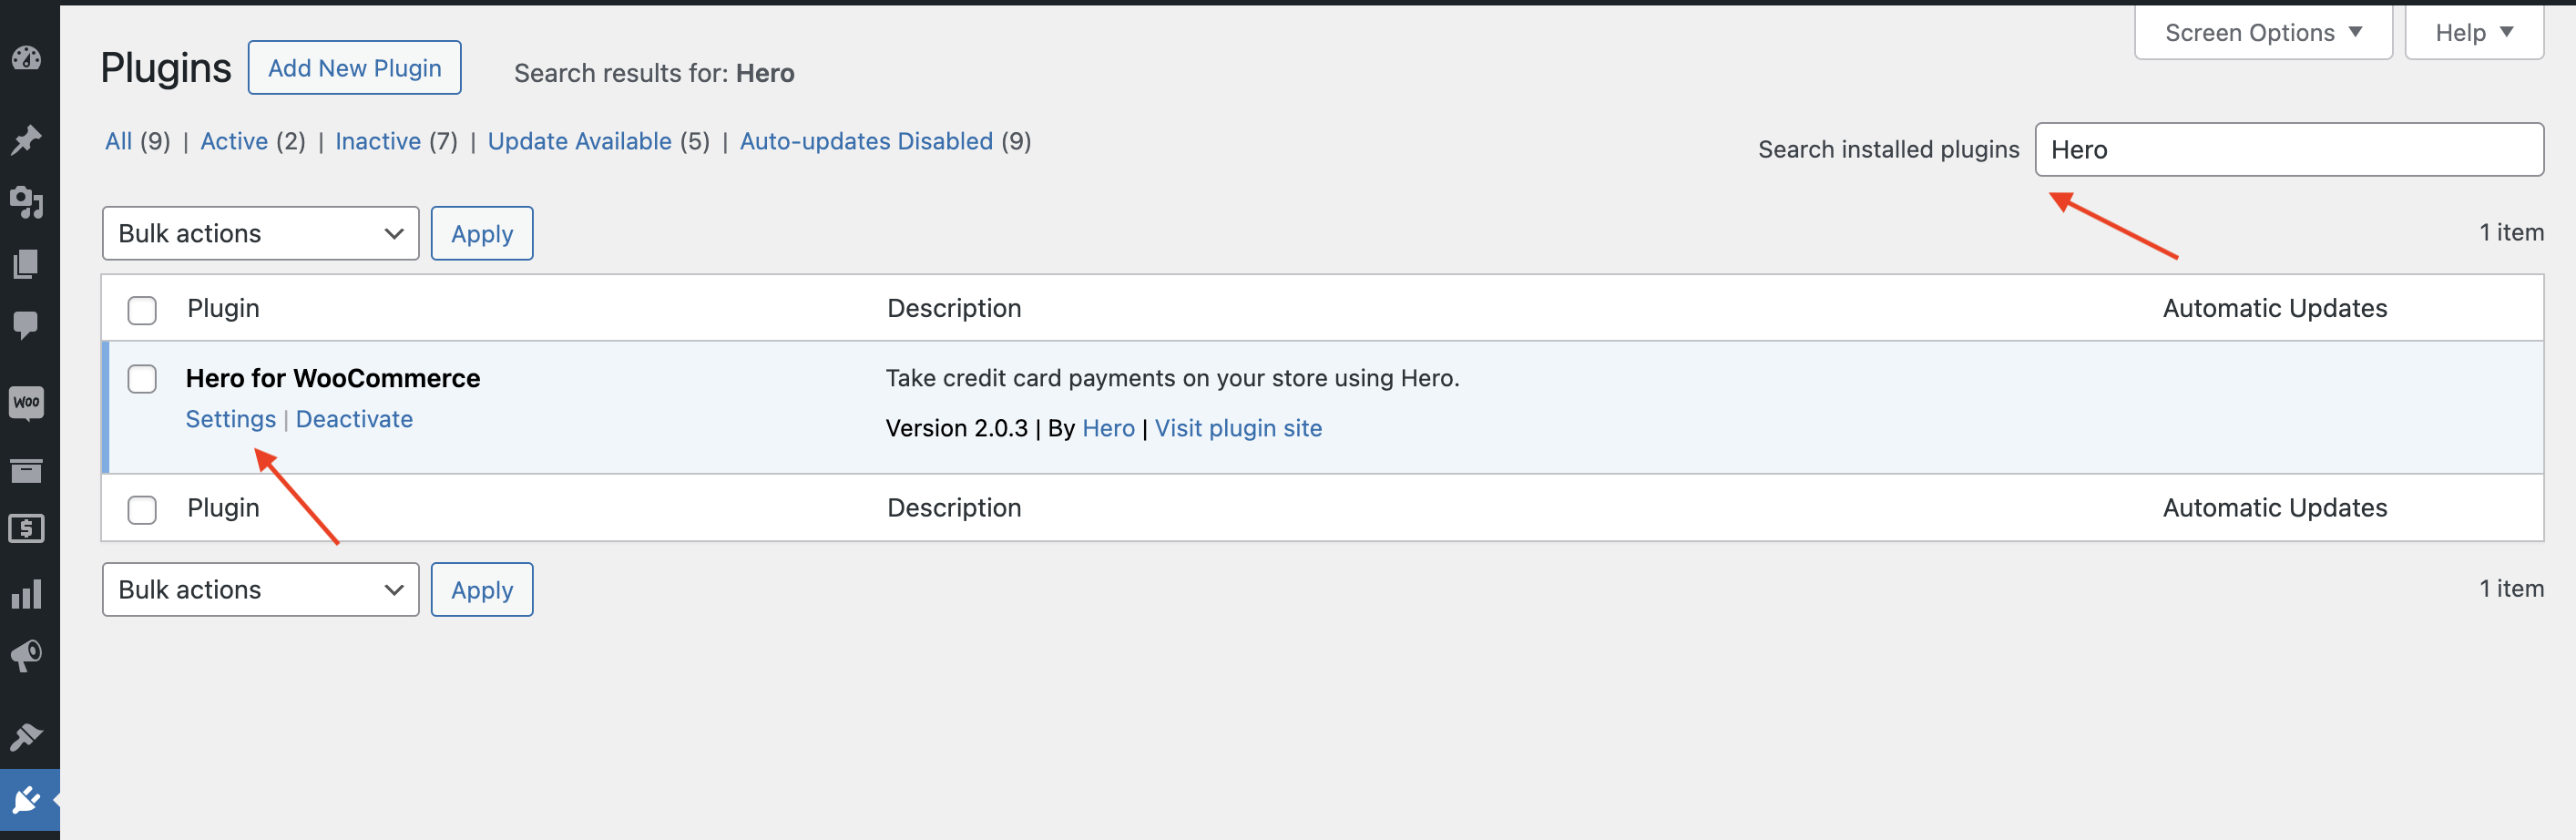
After the Plugin is activated, input Hero in Search installed plugins and click on Settings to configure the Plugin:
-
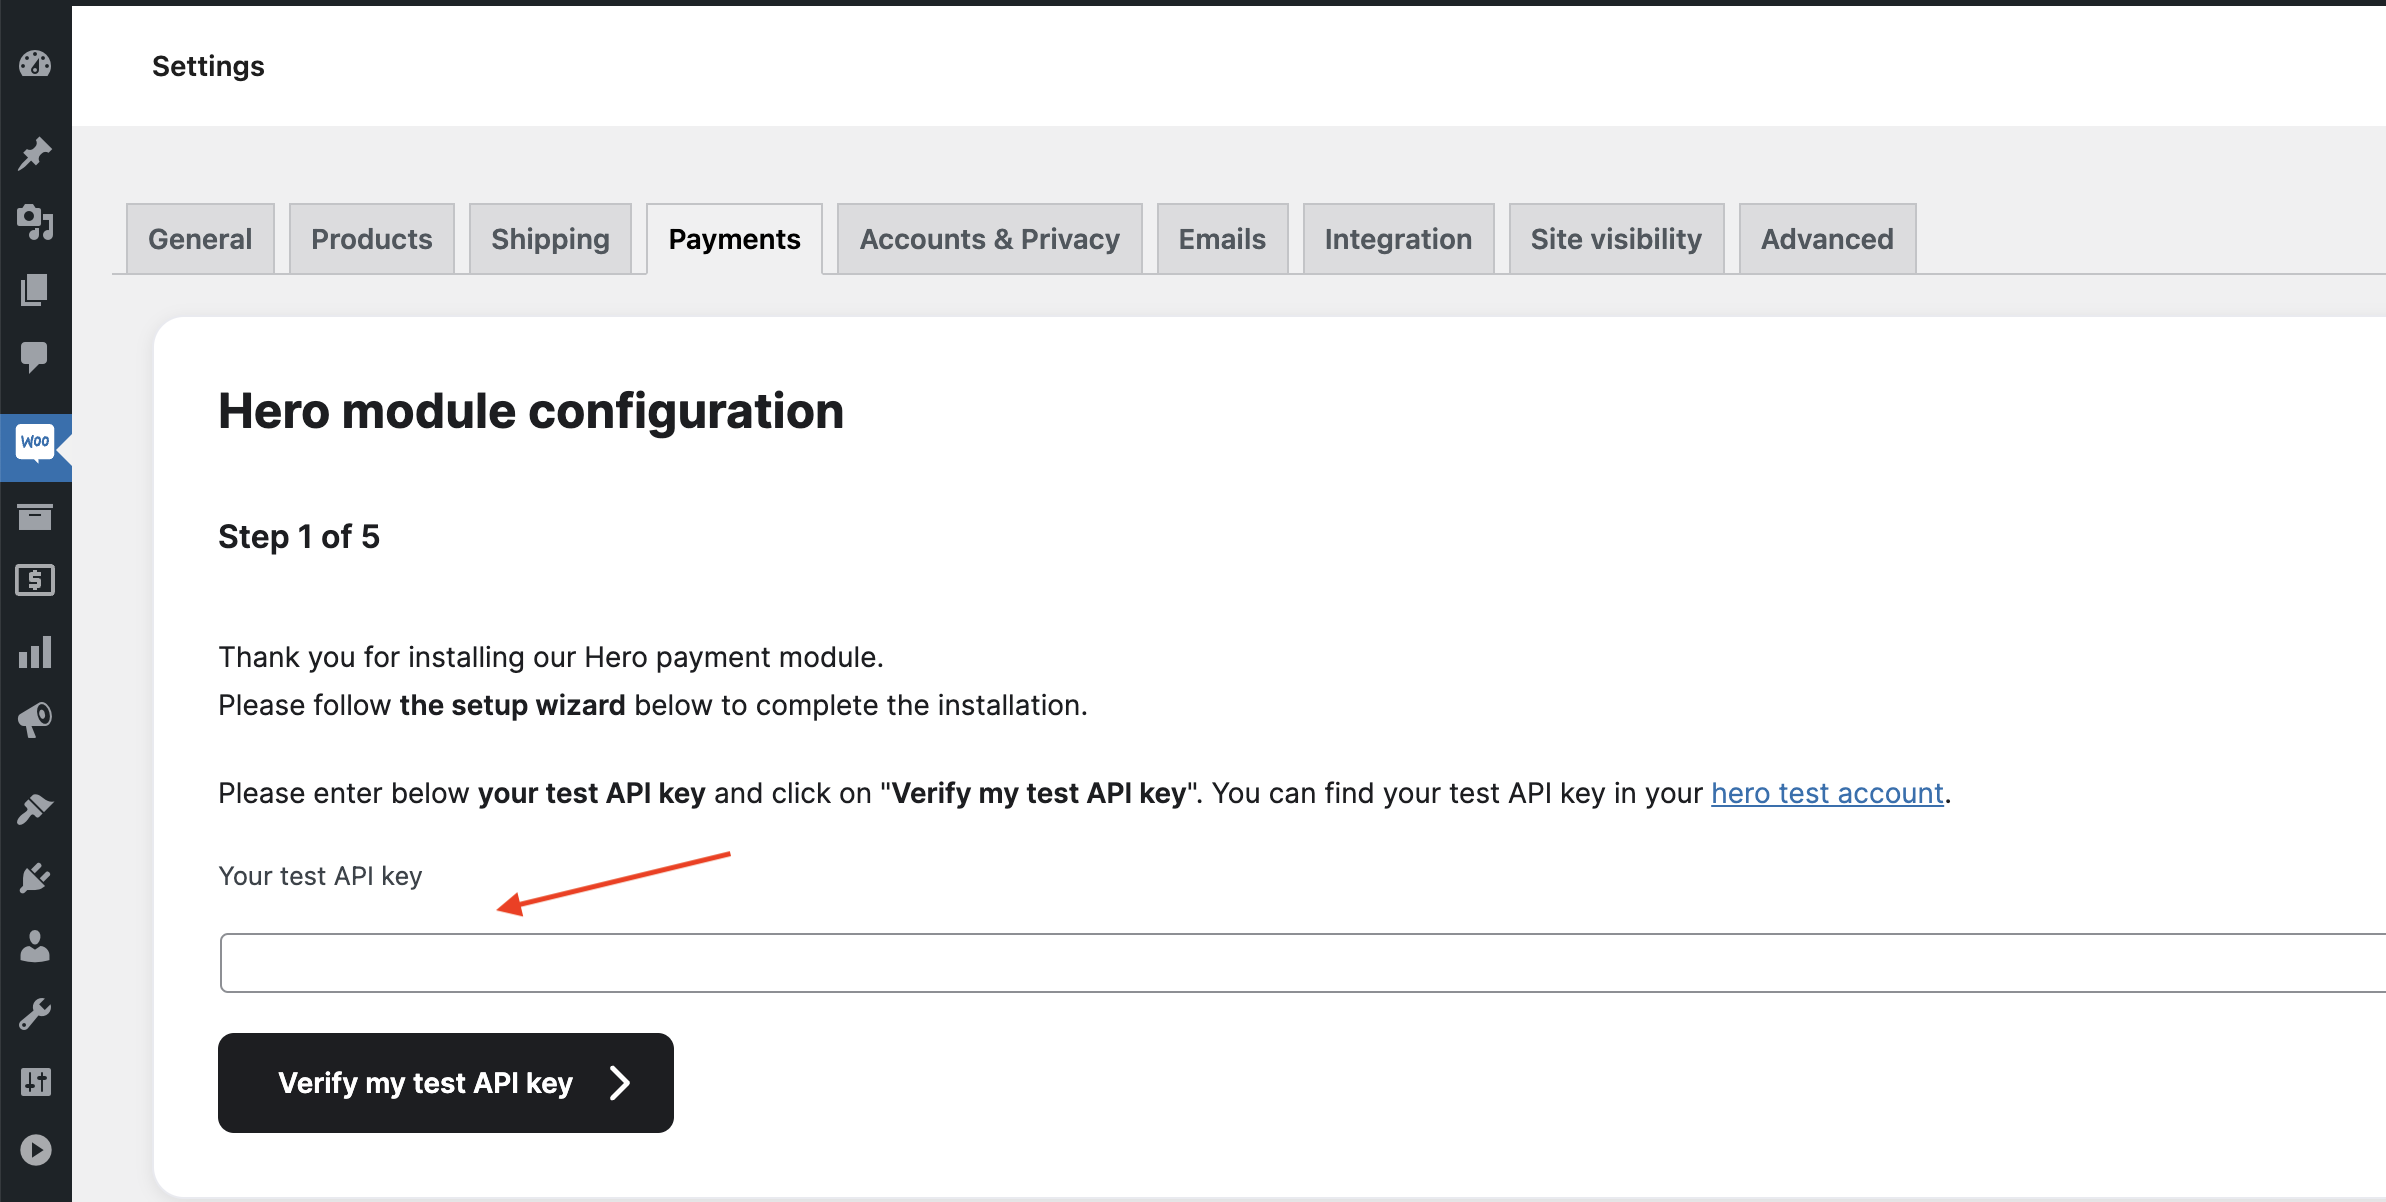
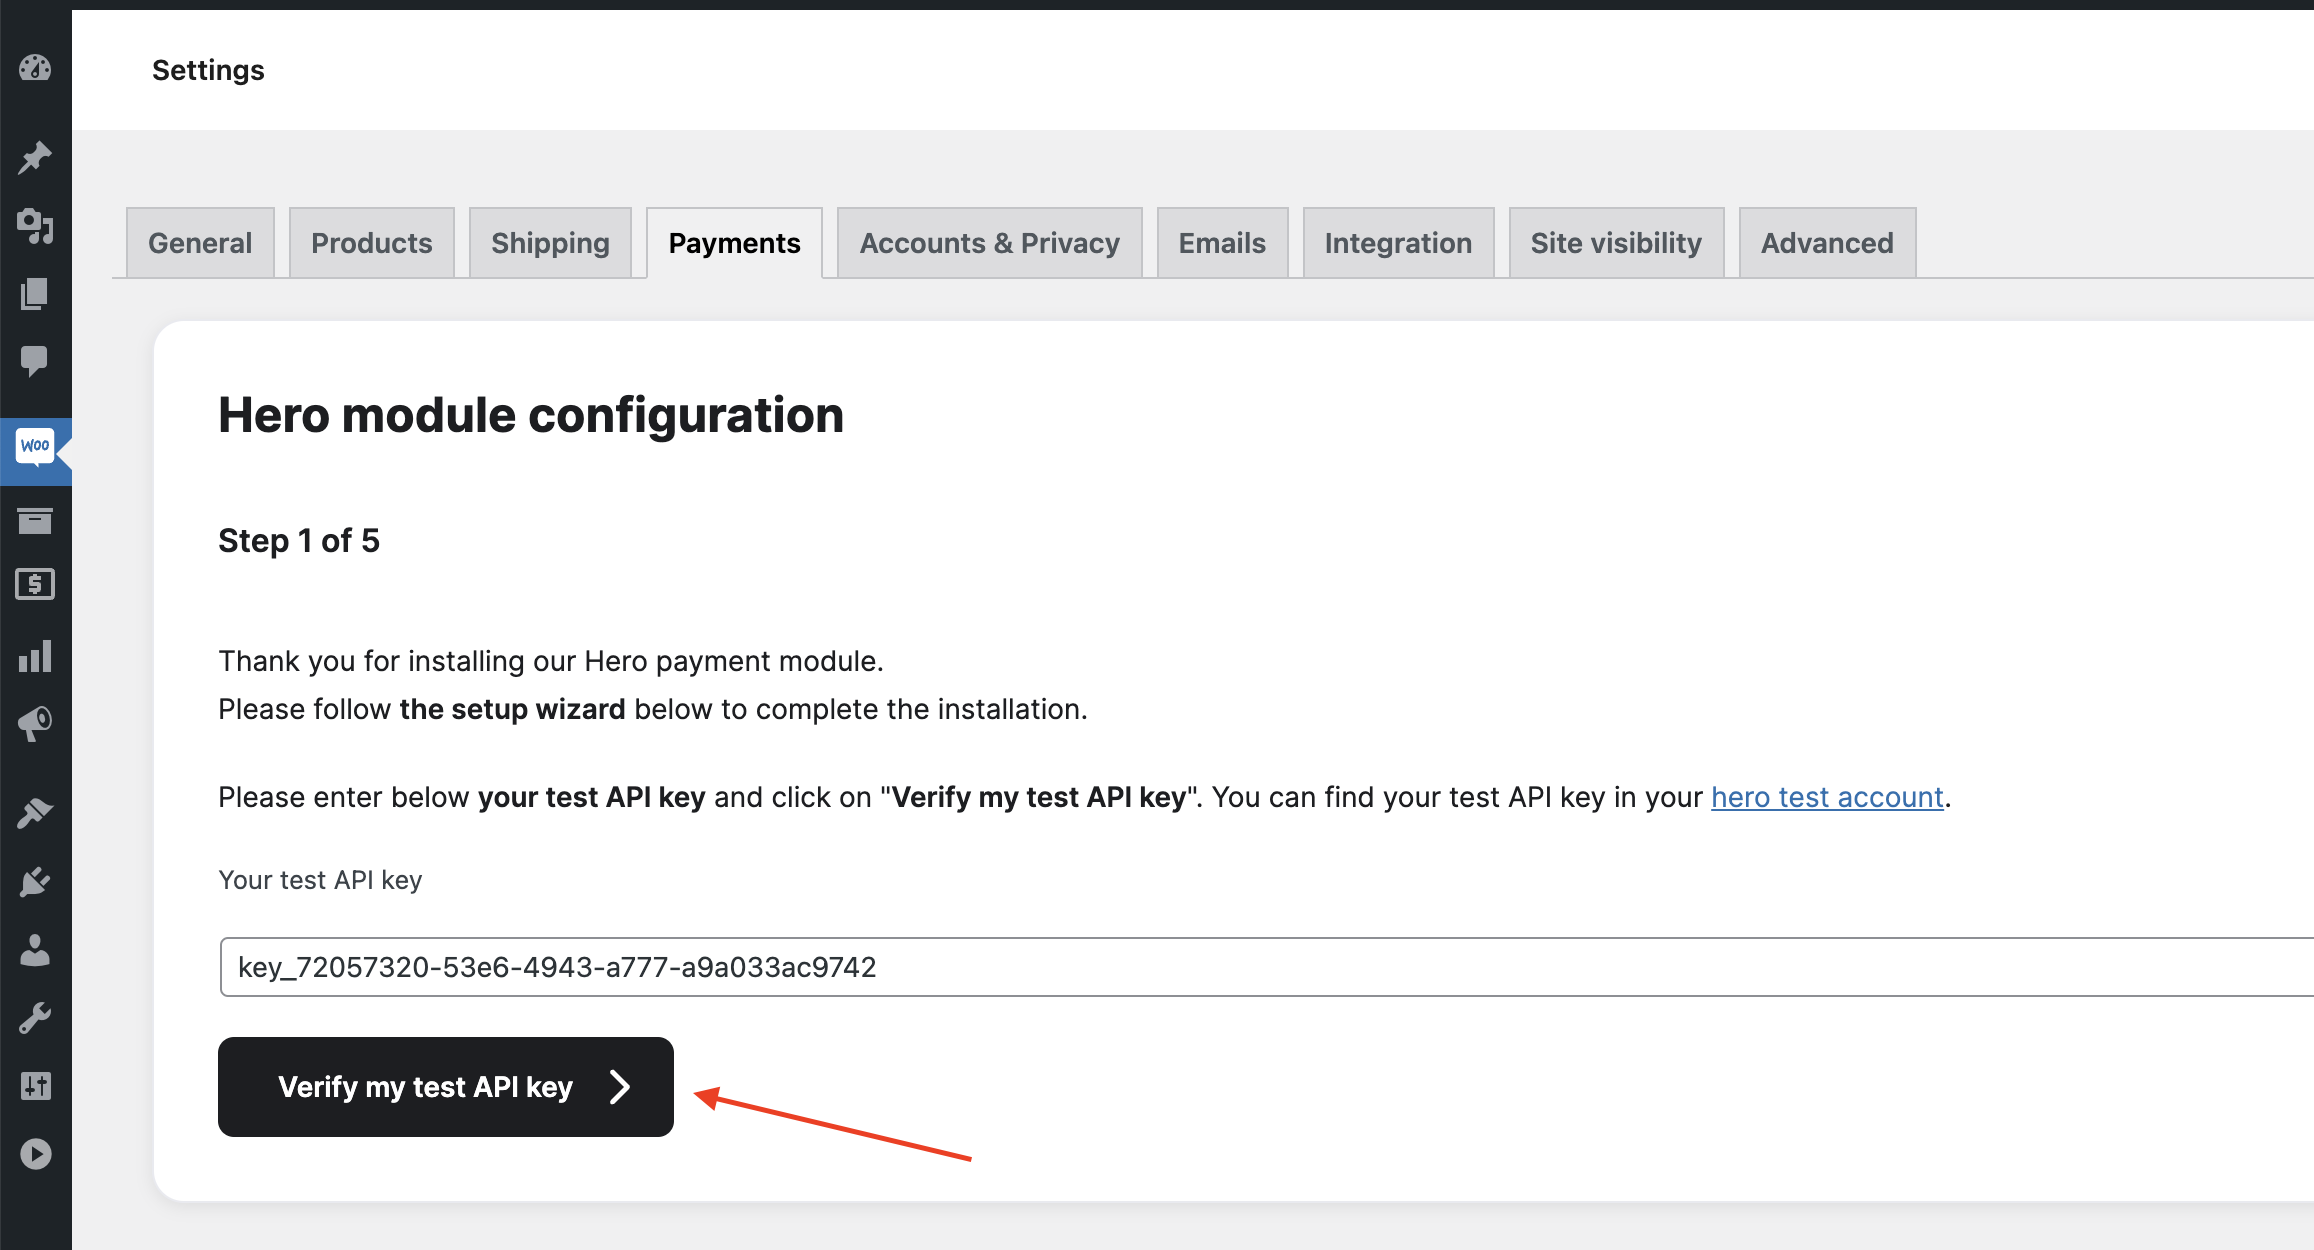
On Step 1 of Hero module configuration, you need to input test API Key. Copy the API test Key provided here and paste it in the field
_Your test API key_: key_72057320-53e6-4943-a777-a9a033ac9742
-
Once the Test API key is pasted in the field, click on Check my test API key.
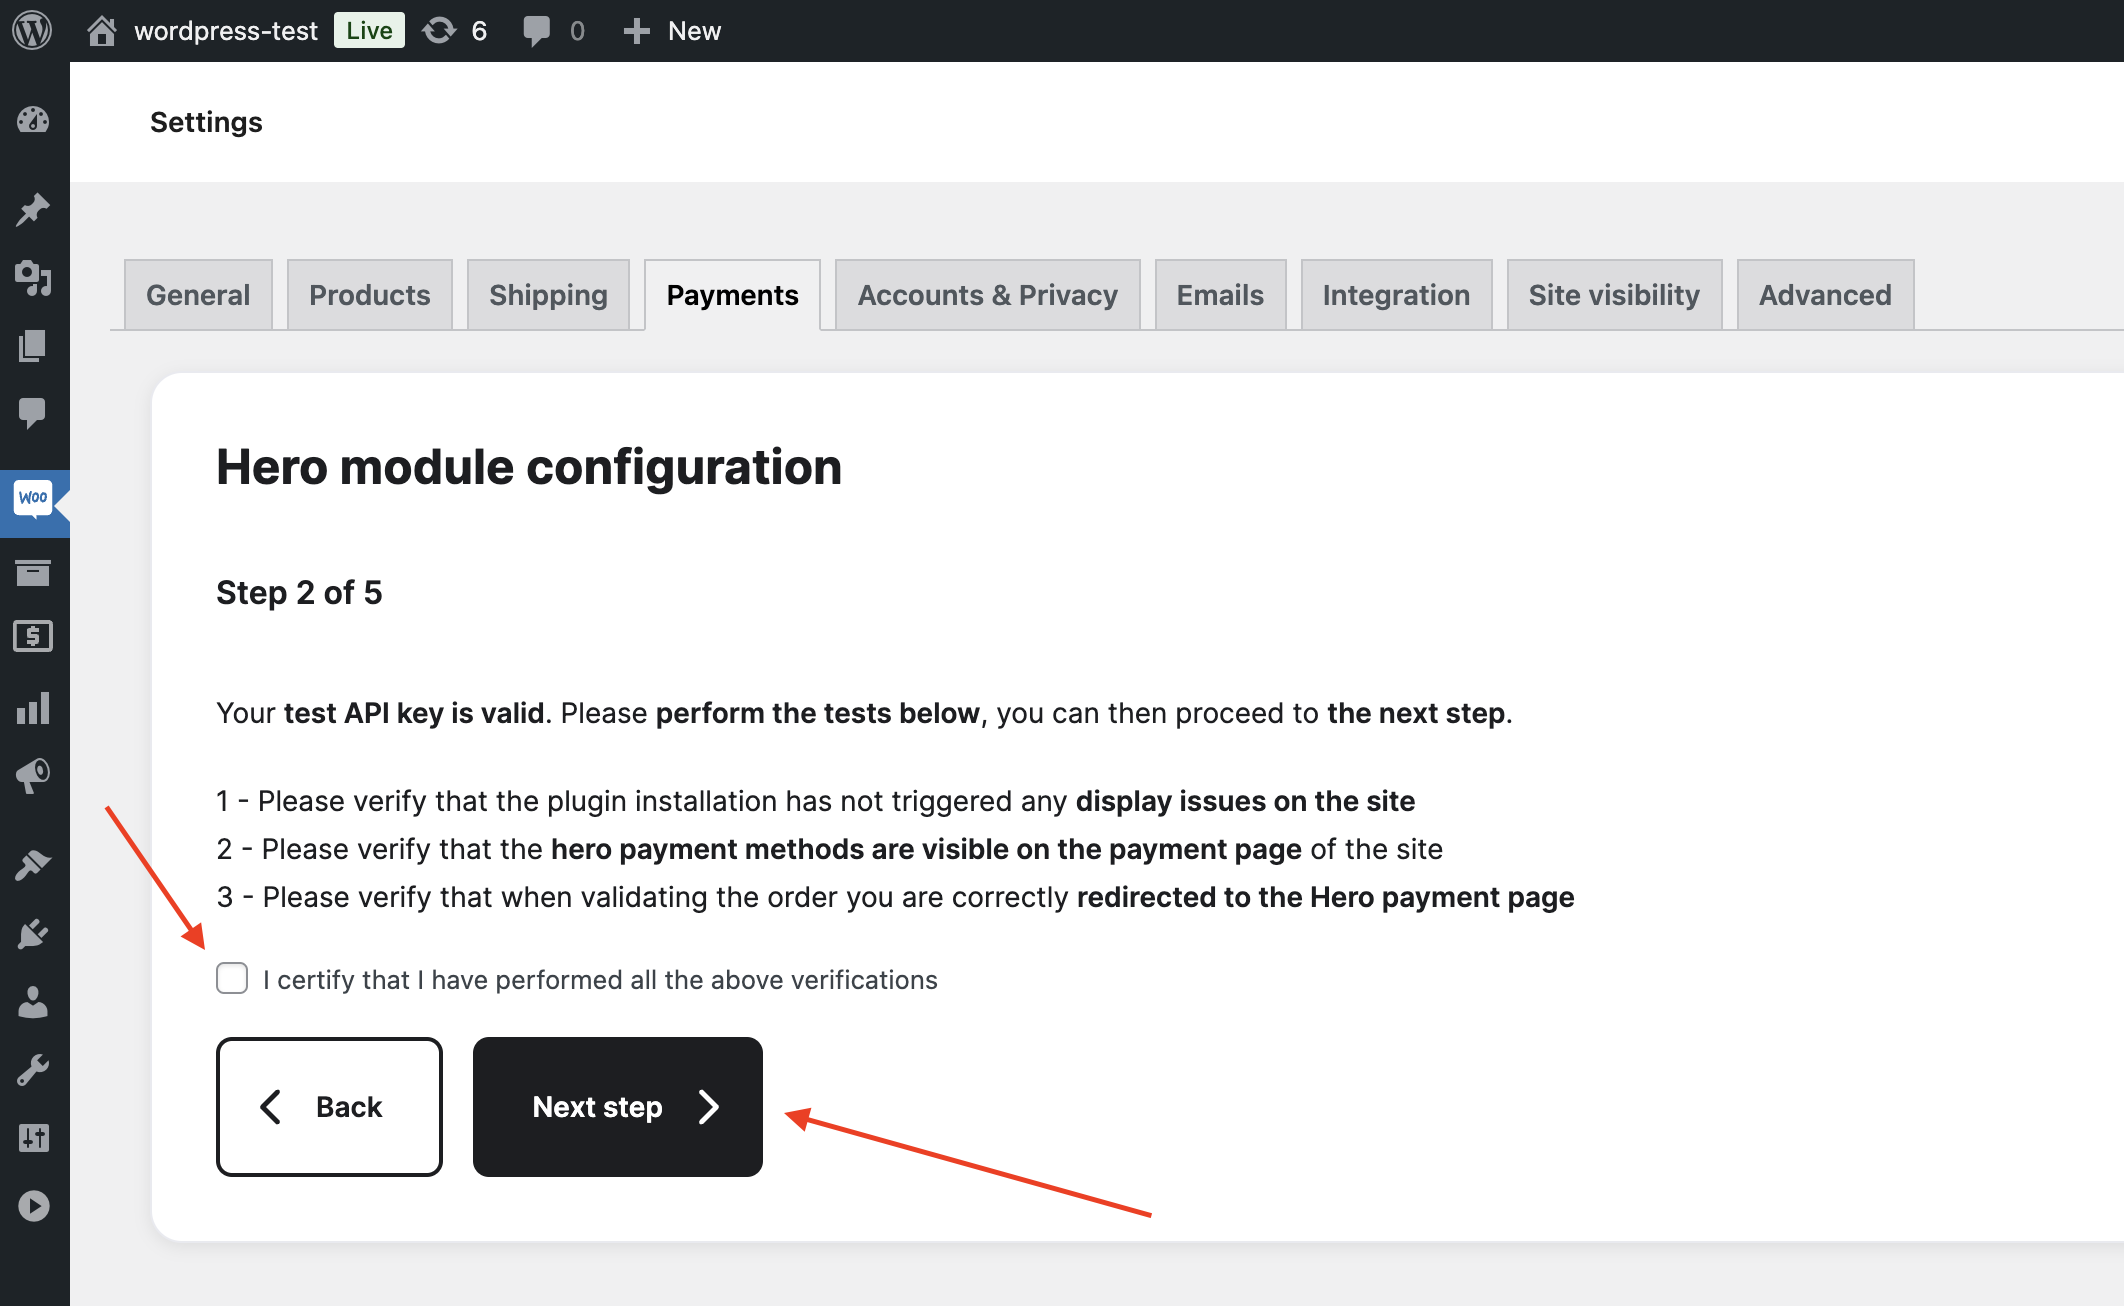
Step 3: Verify Integration
-
On Step 2, follow the instructions. Right Click on Visit Store and verify that everything described in test steps is working well.
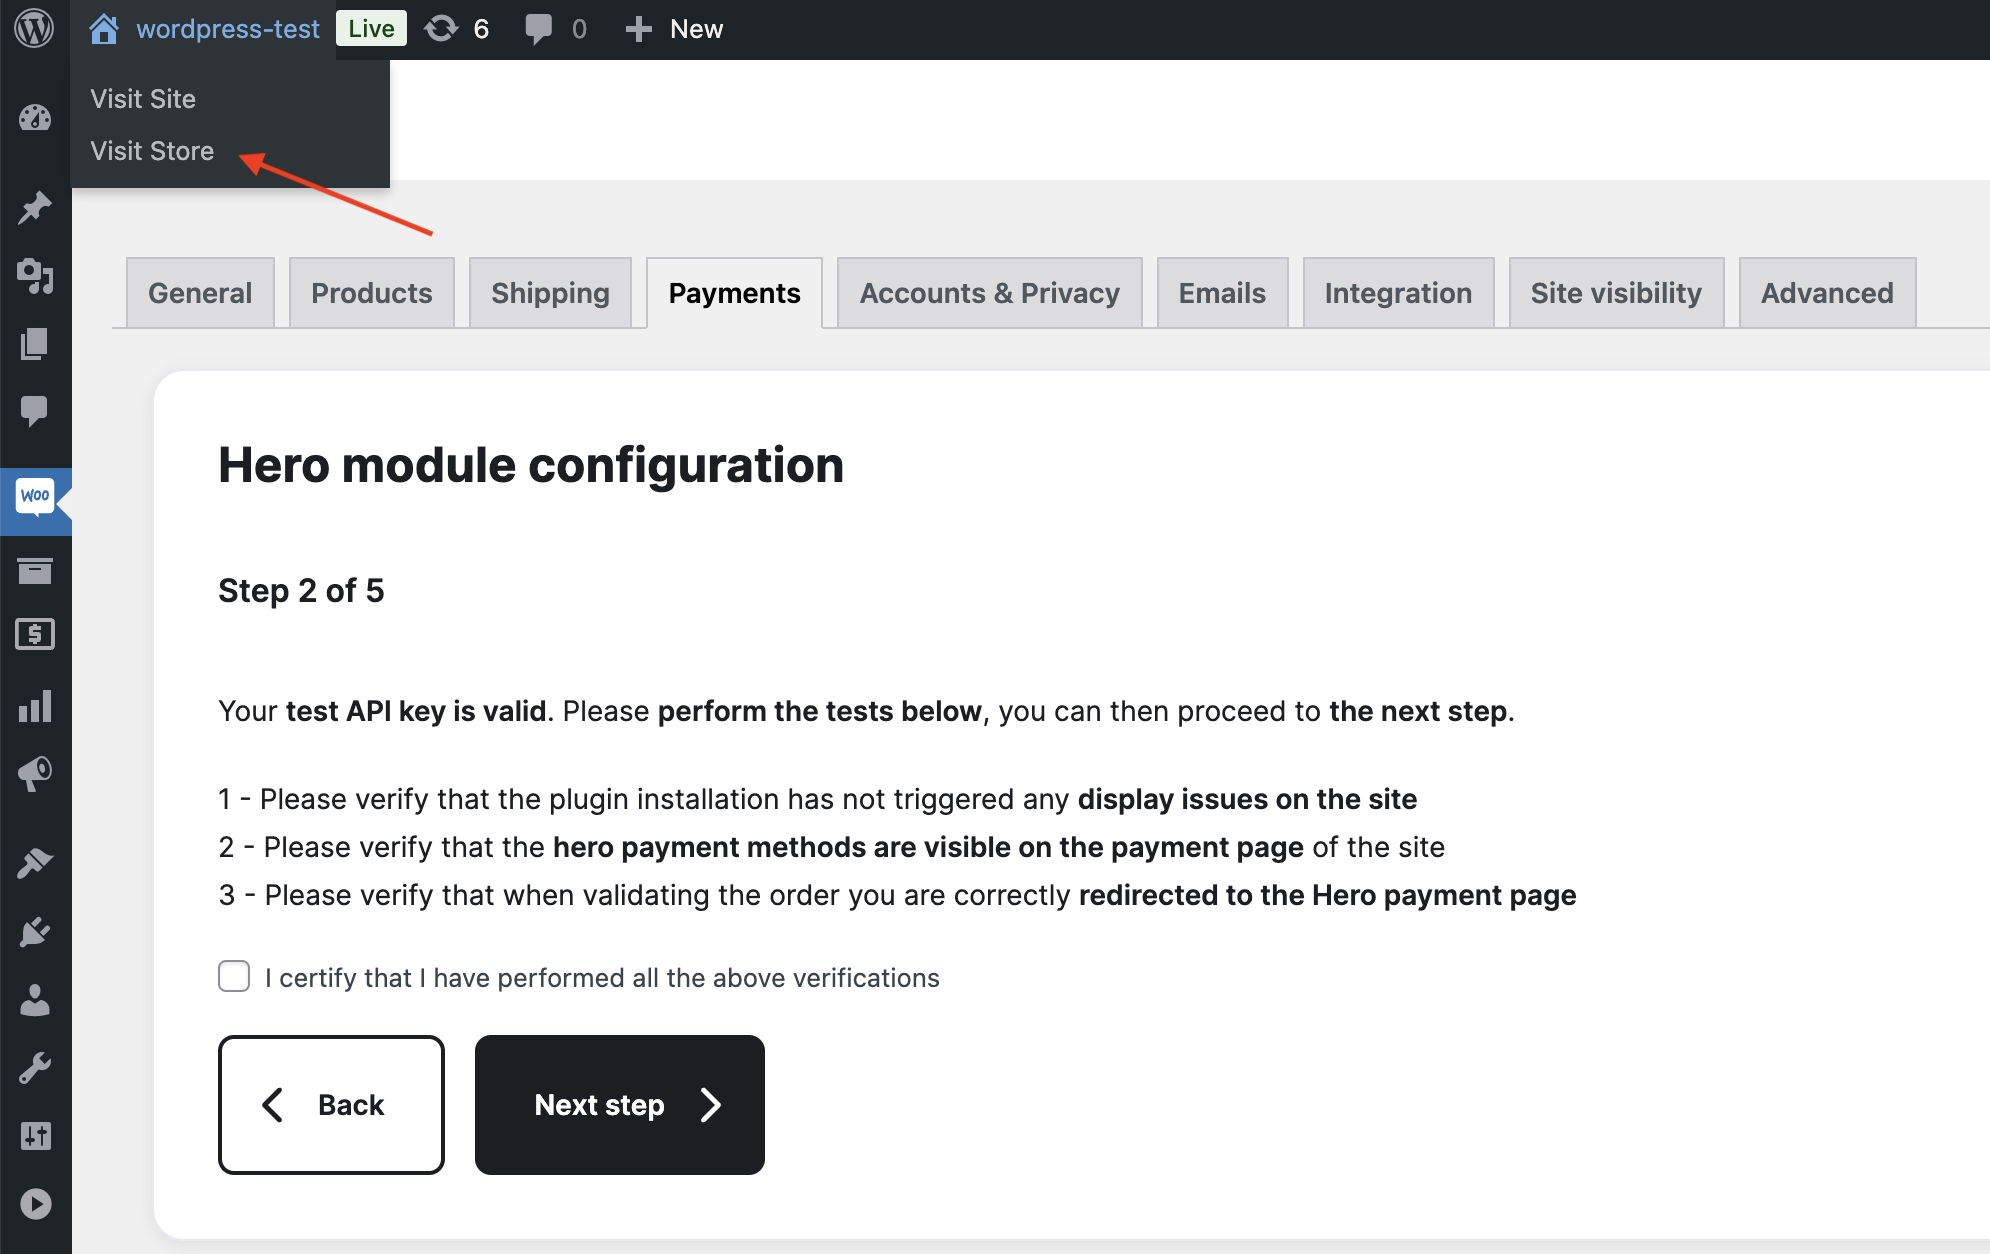
Testing Steps (expand for details)
- Explore your site and add one of the products to the cart, to test the payment page and redirect.
- Once you add the product, initiate checkout. You should be able to see Hero Payment method on the payment page of your site:
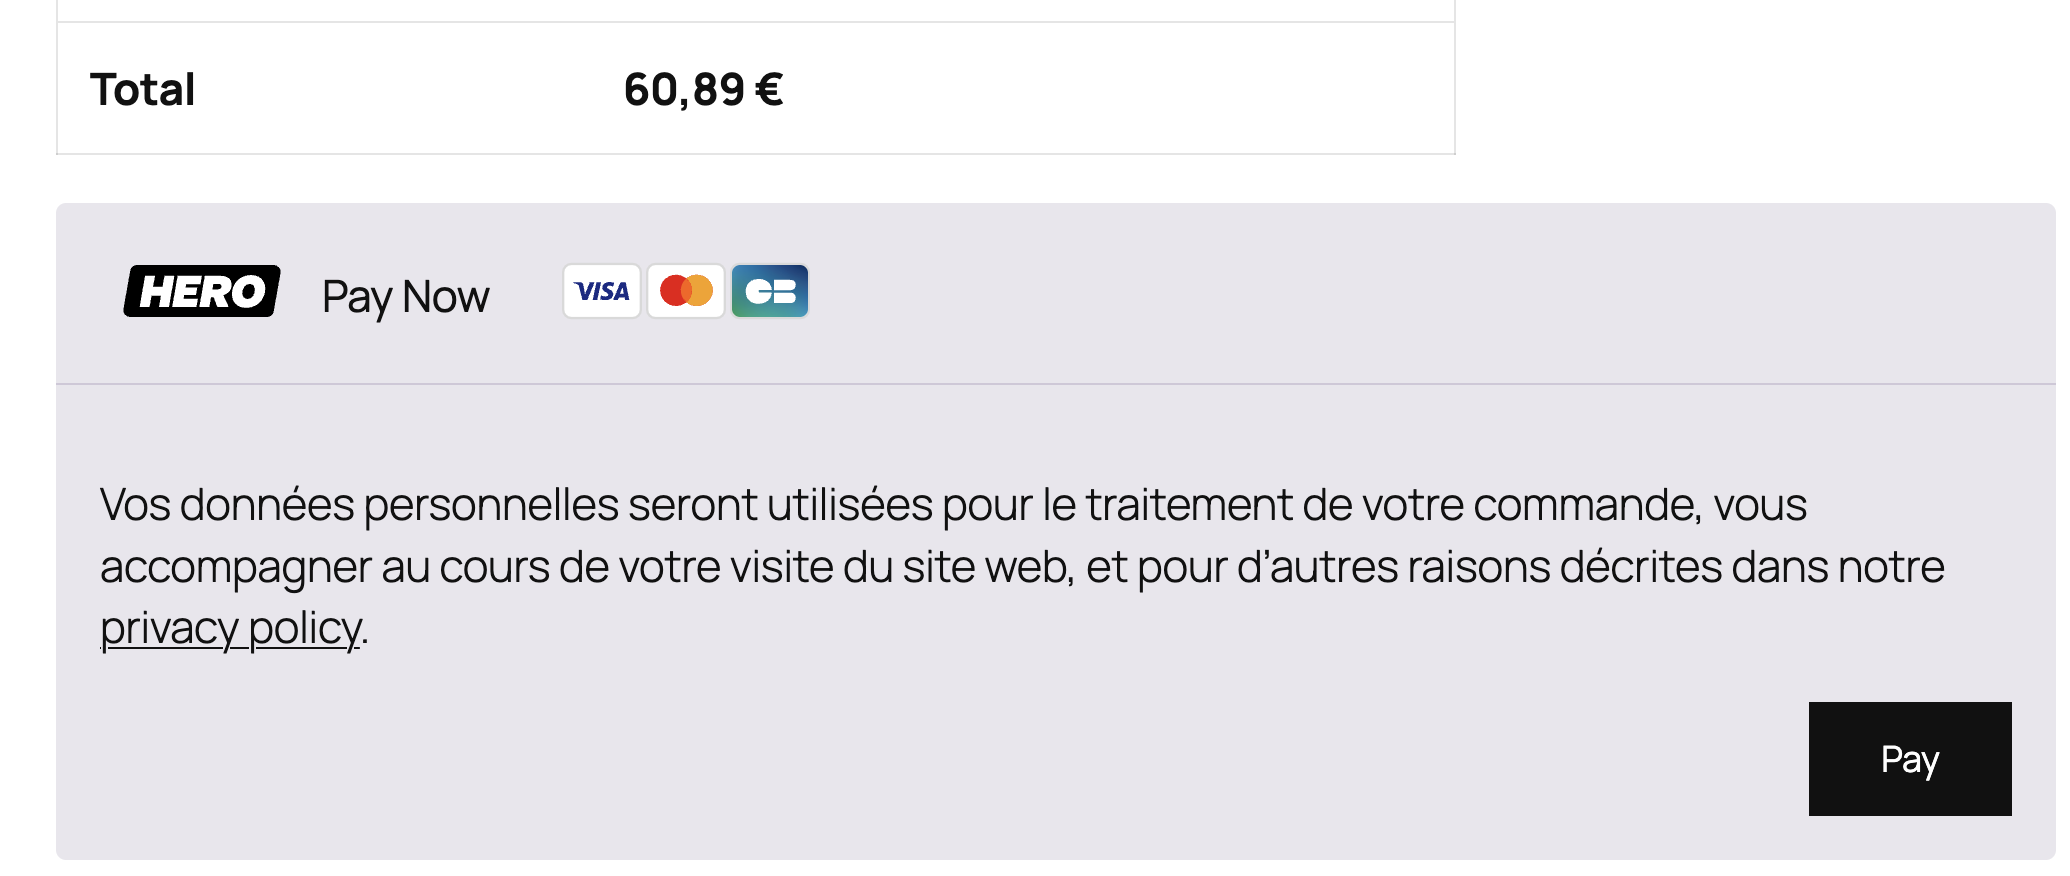
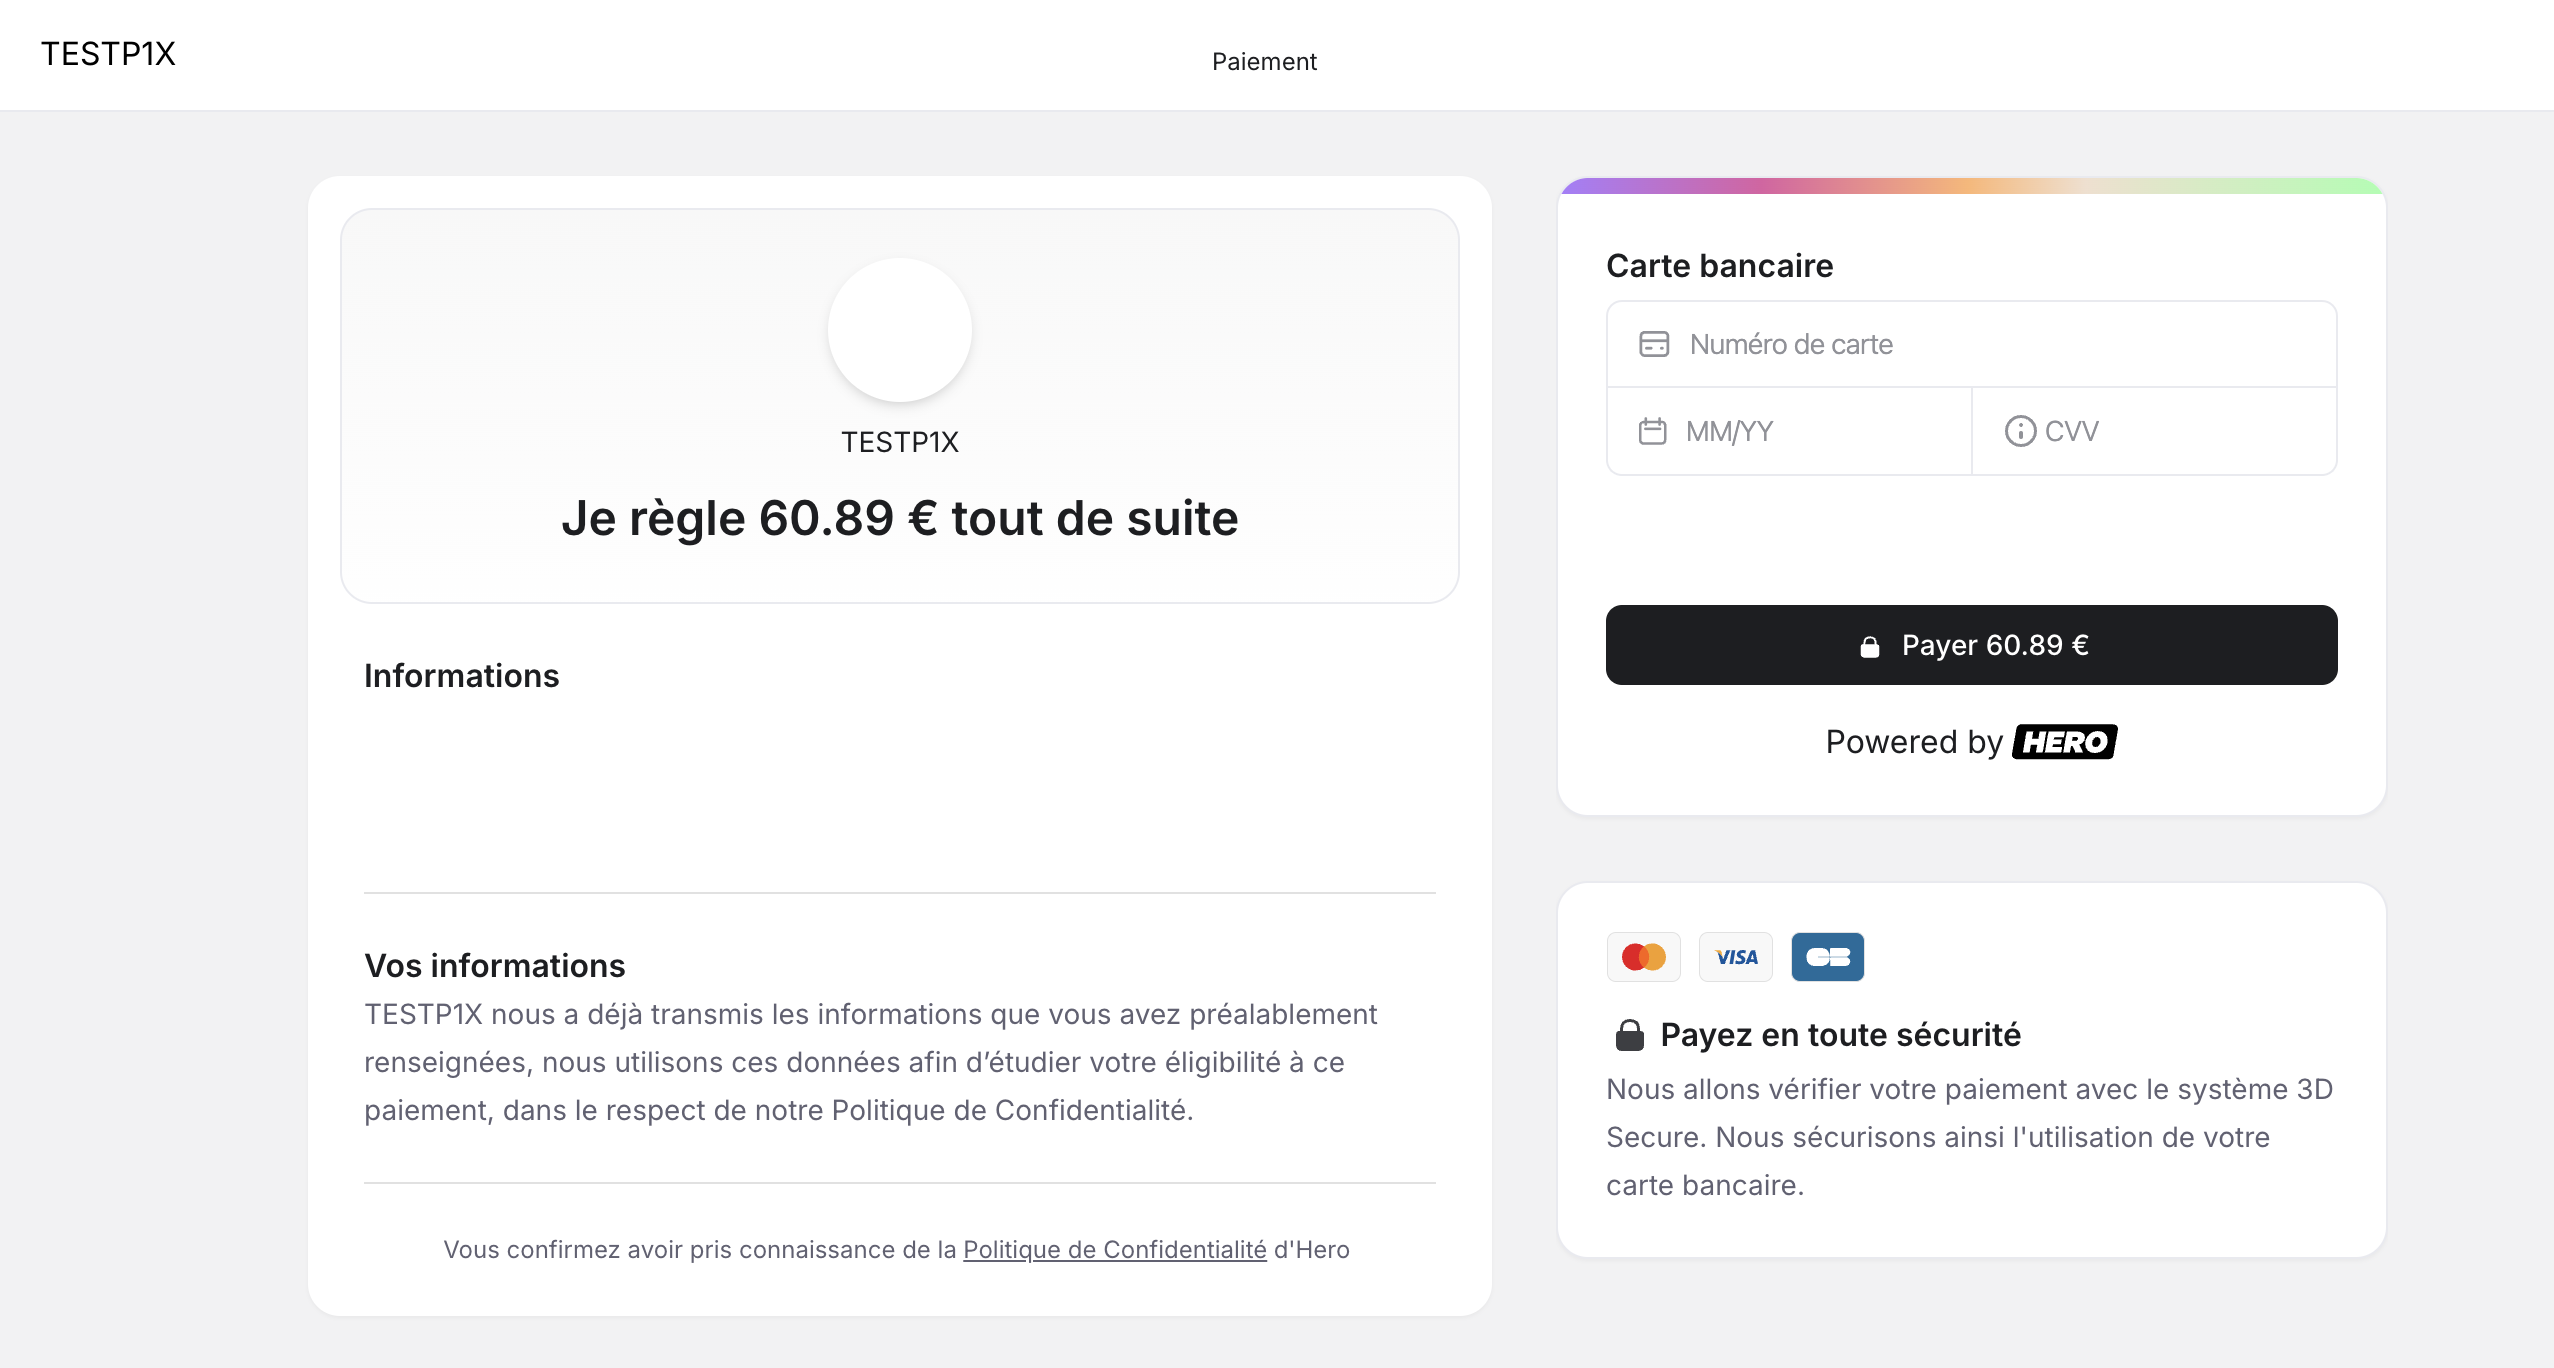
- When you click Pay it should redirect you to the Hero's test payment page
-
Once you have finished the verifications, tick the box - I certify that I have performed all the above verifications and click on Next Step:
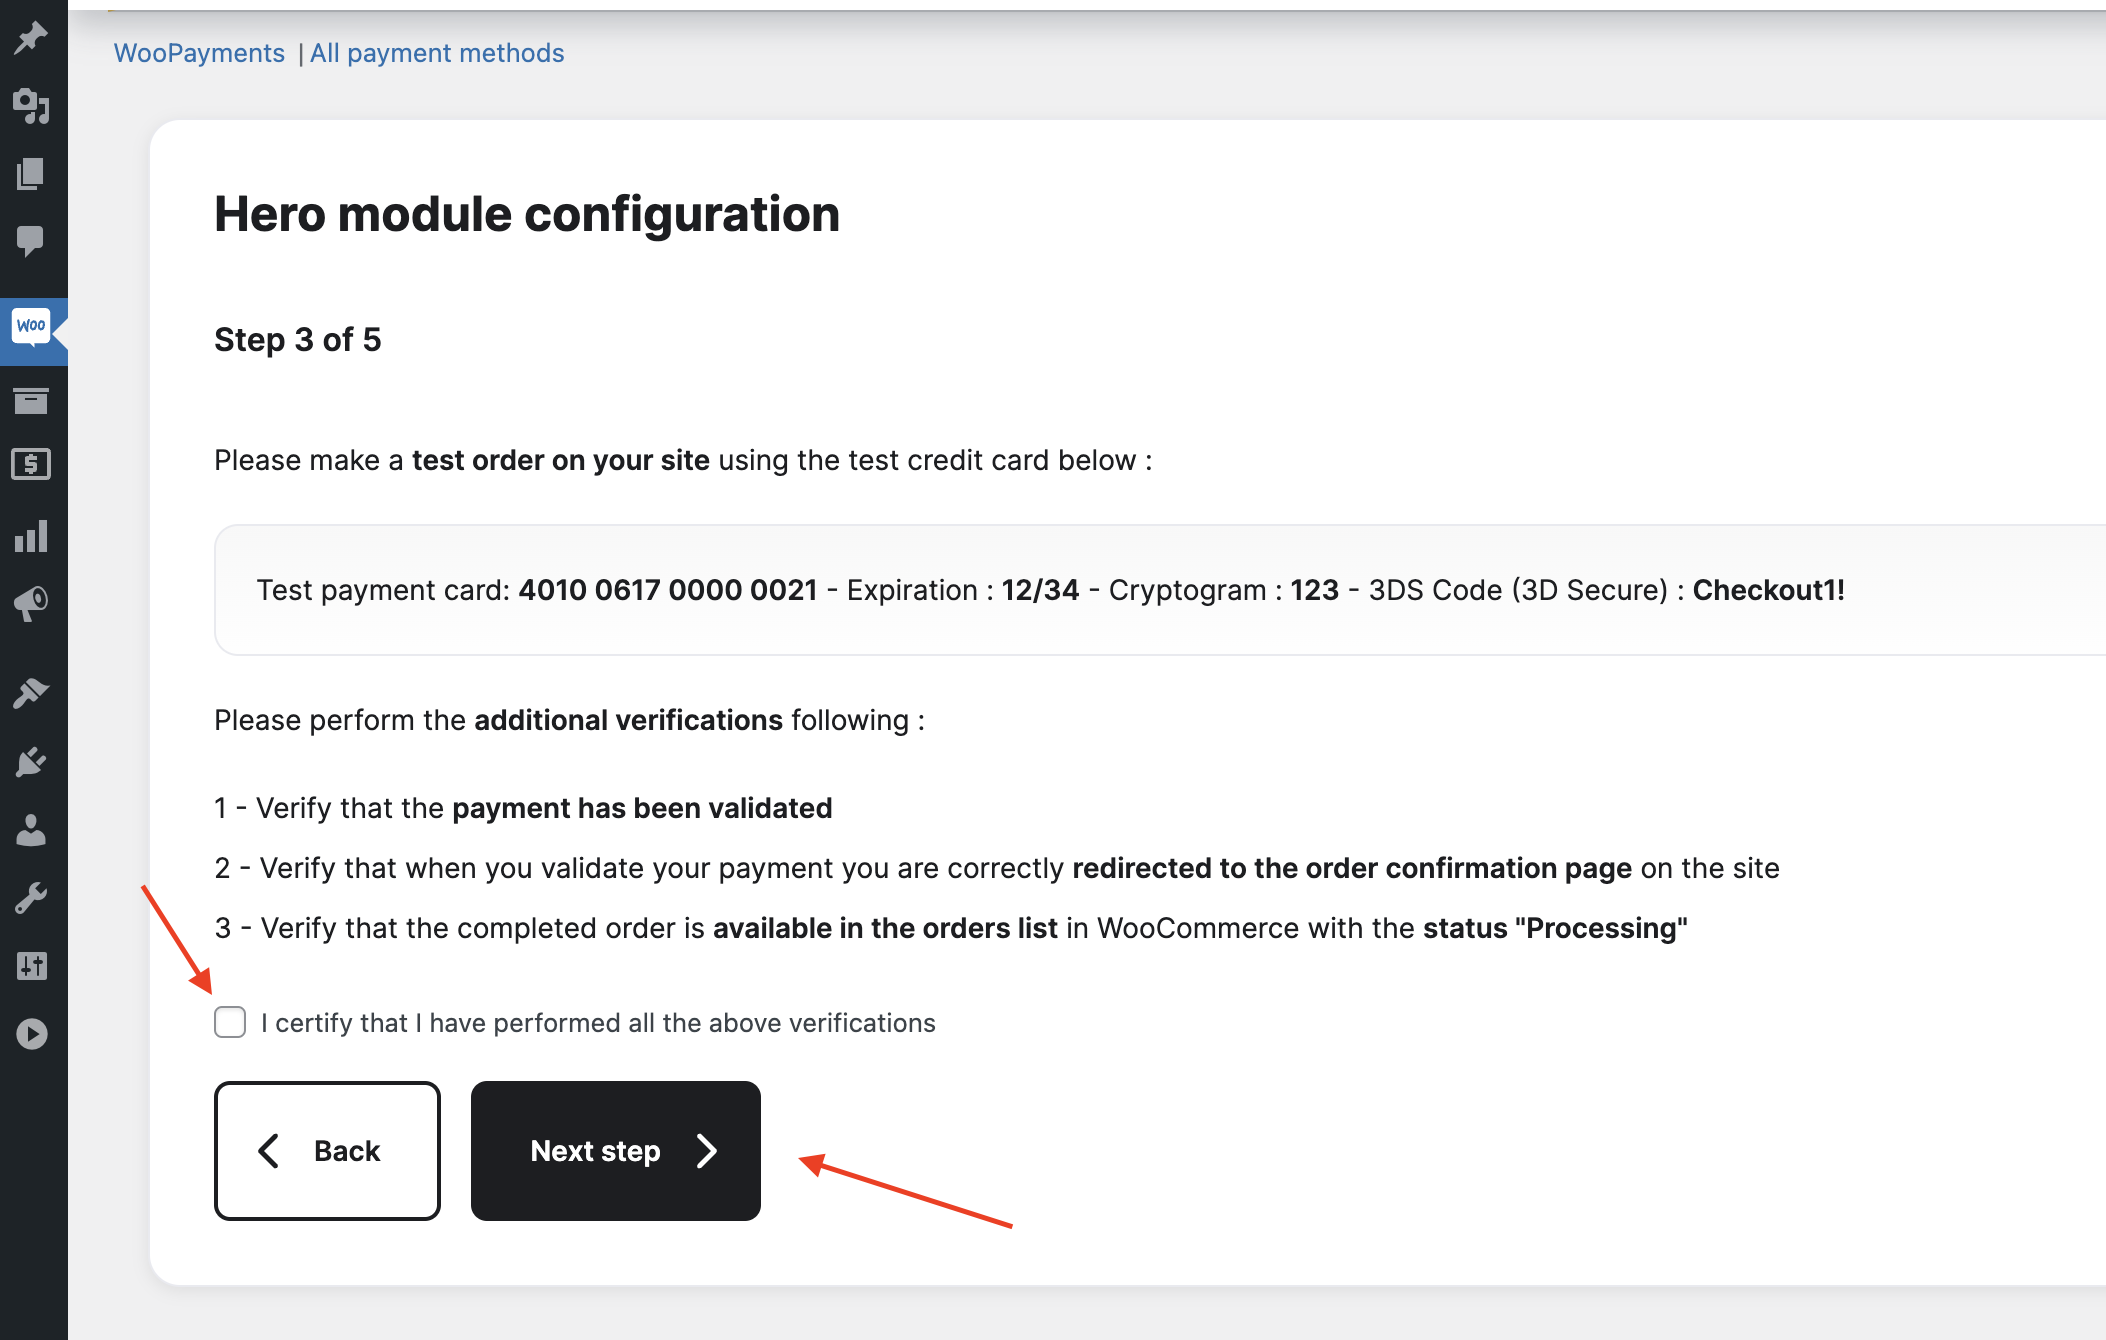
Step 4: Test Order
-
On Step 3, Make a test order on your site with TEST credit card credentials. If the test is successful, you can continue the plugin setup, otherwise write to us at support@hero.fr.
Test payment credentials:
Card: **4010 0617 0000 0021**
Expiration: **12/34**
CVV: **123**
3DS Code: **Checkout1!**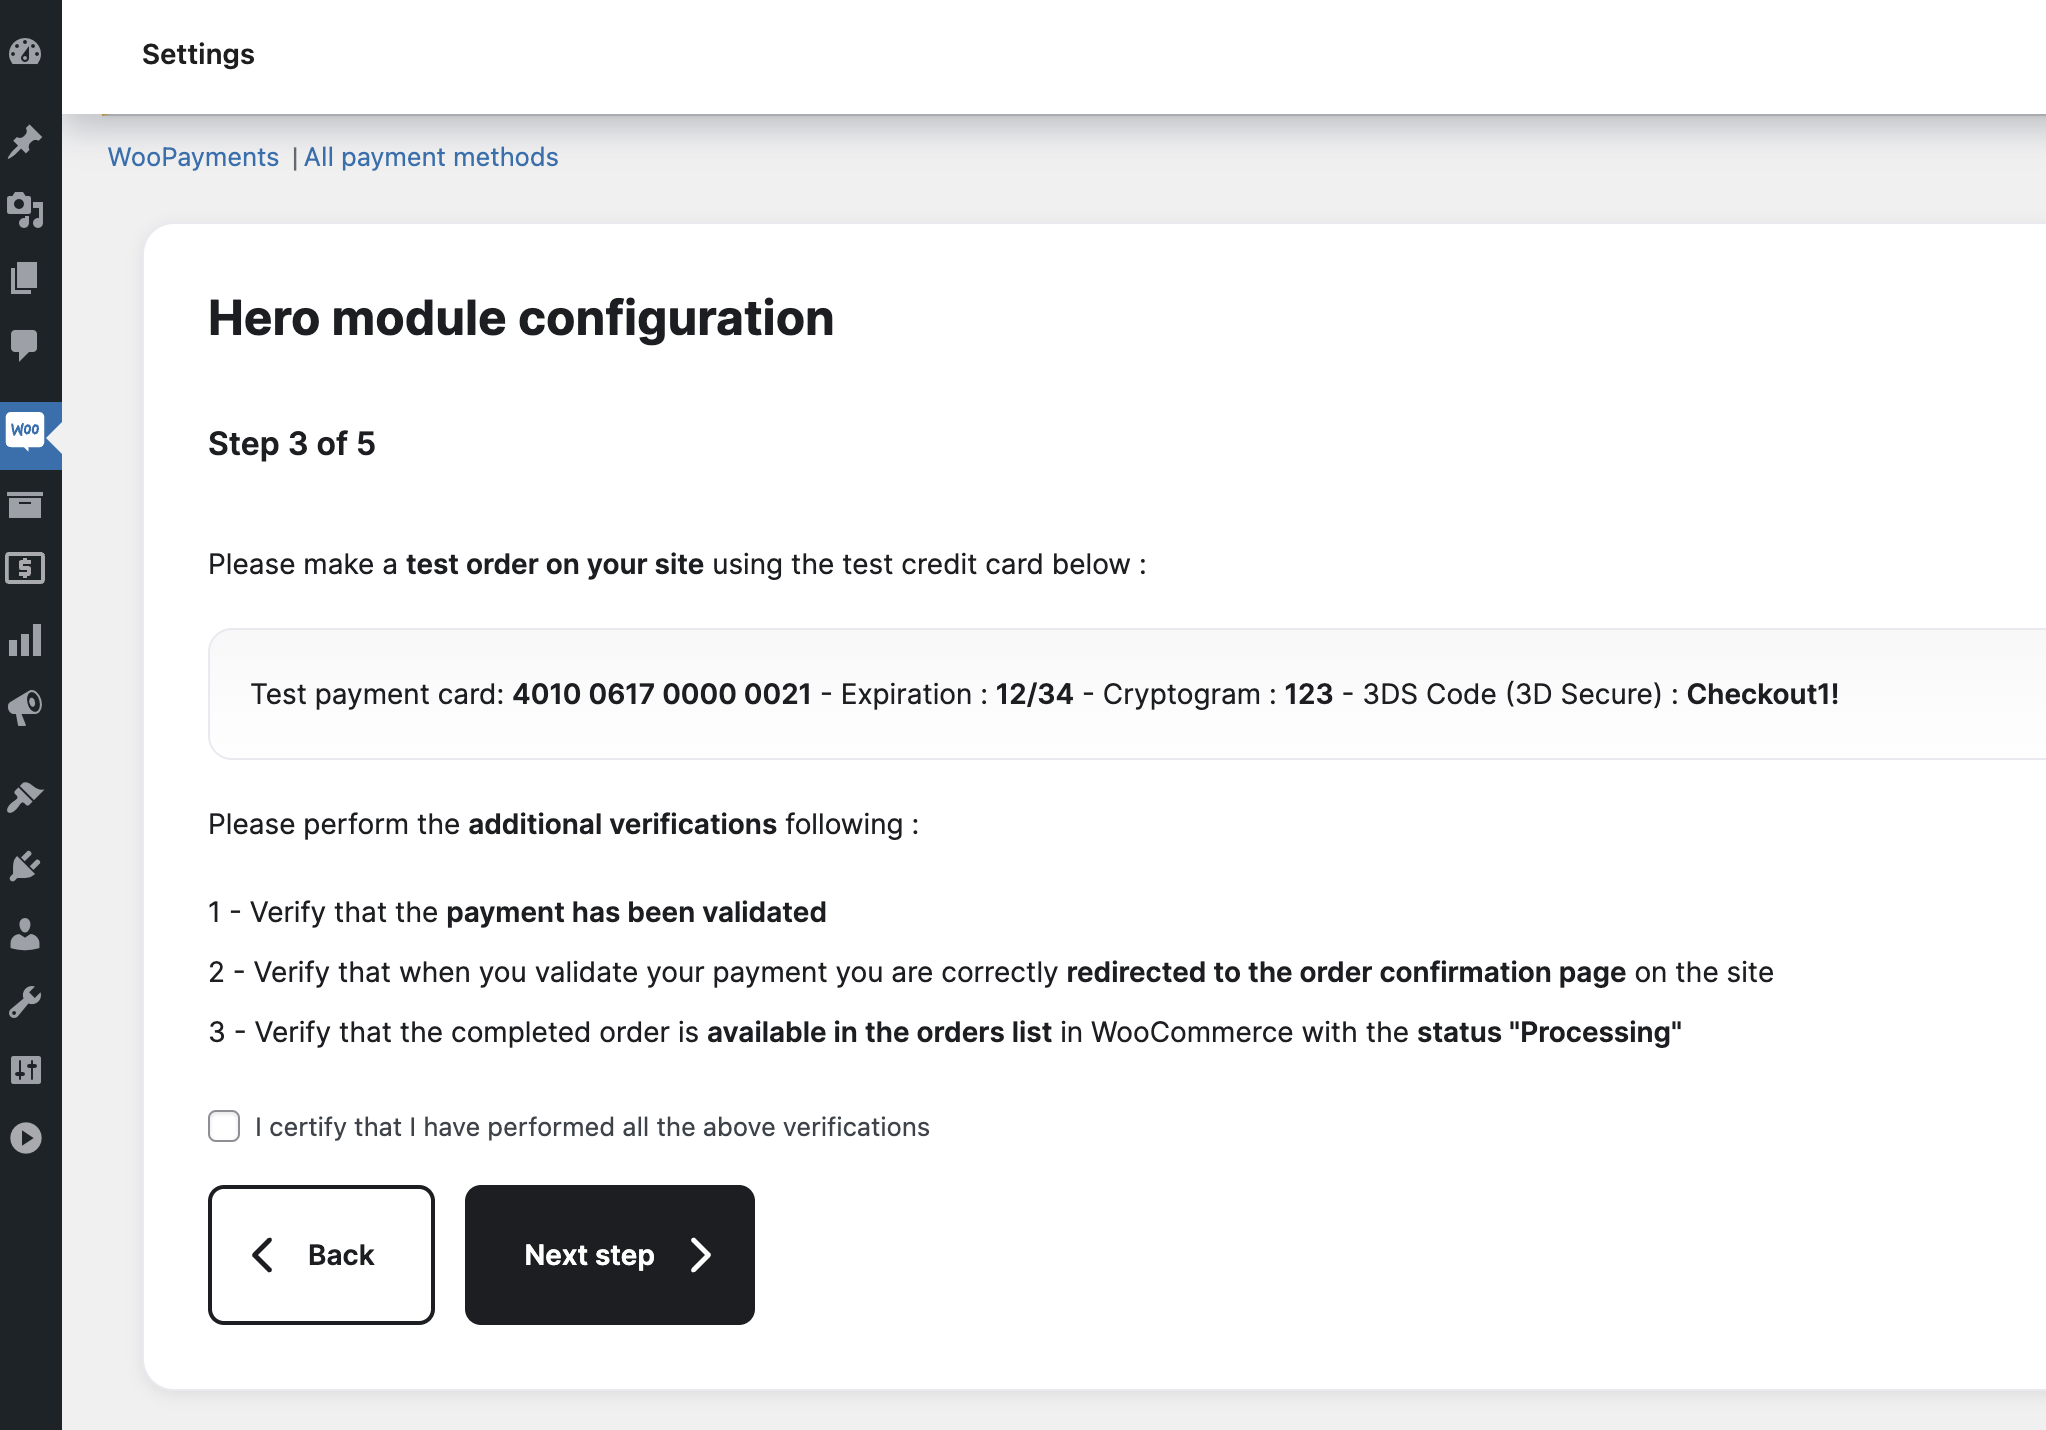
Test Payment Steps (expand for details)
- Initiate payment again on your website and input TEST credit card credentials on the Hero payment page:

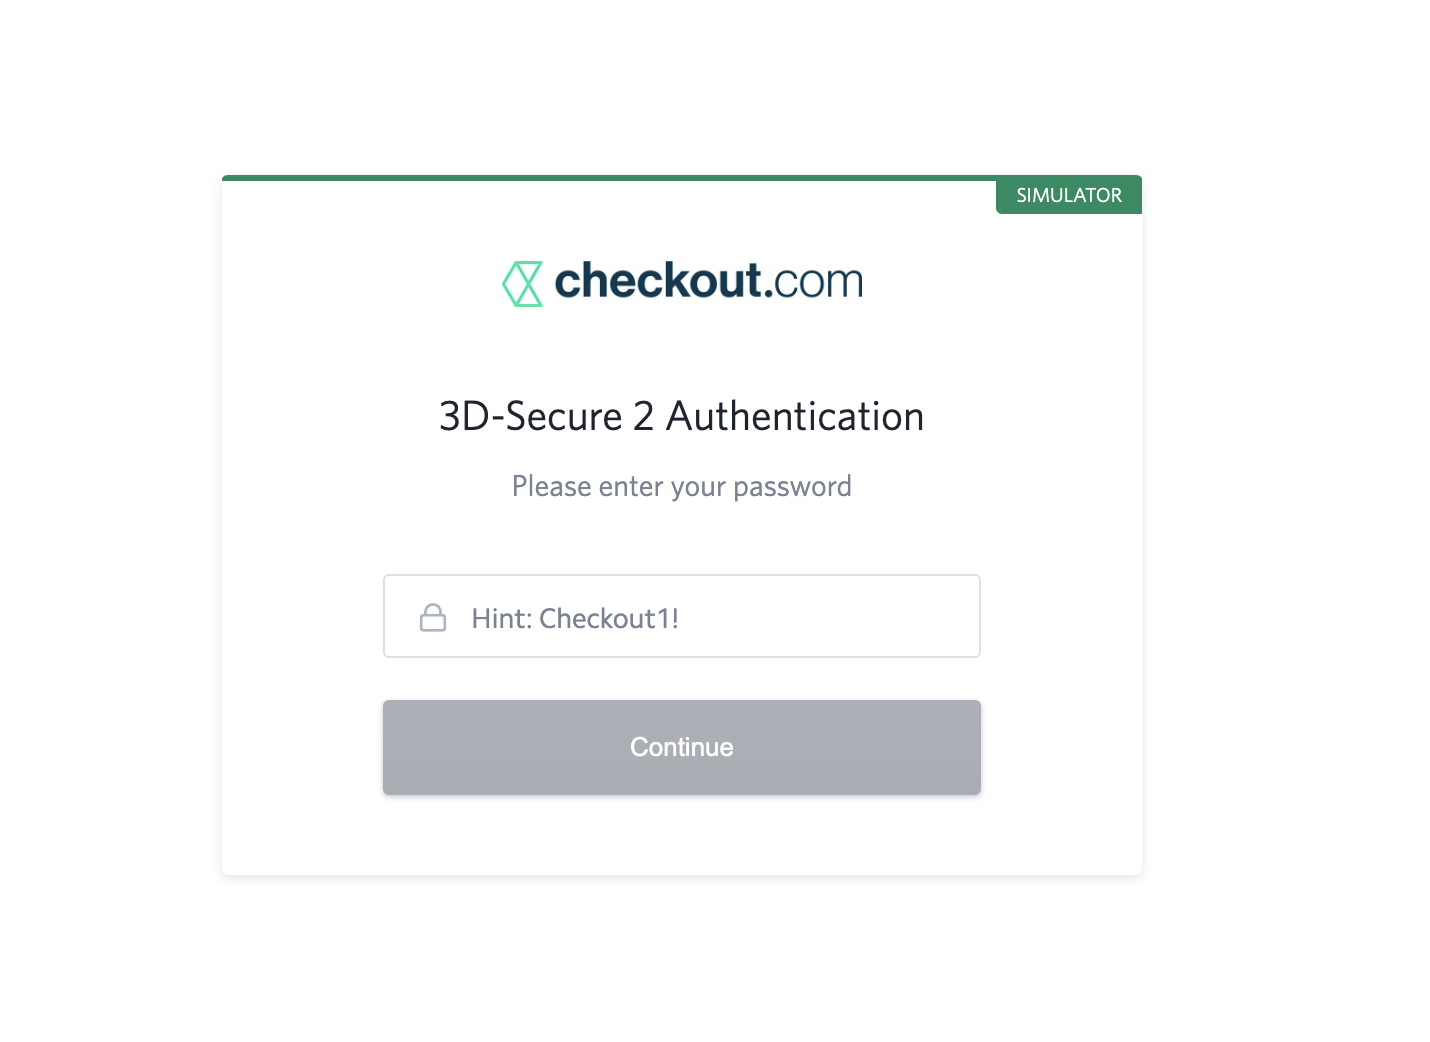
- Input the test 3DS code: Checkout1! - to confirm the TEST payment:
- Once the payment is successful, you will see the Purchase confirmation page and after that you will be redirected back to your website to see the TEST order.

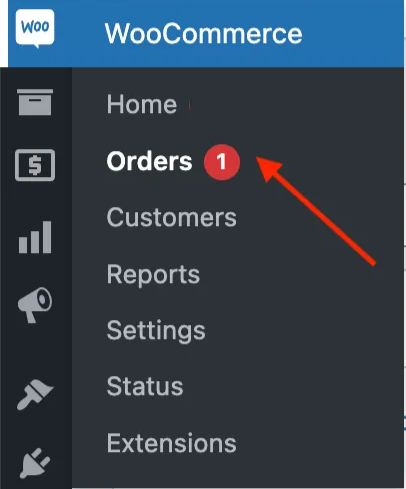
- From your Woocommerce Admin, click on Woo and verify that the successful order is visible in your orders.

- Initiate payment again on your website and input TEST credit card credentials on the Hero payment page:
-
Once you have finished the verifications, tick the box - I certify that I have performed all the above verifications and click on Next Step:
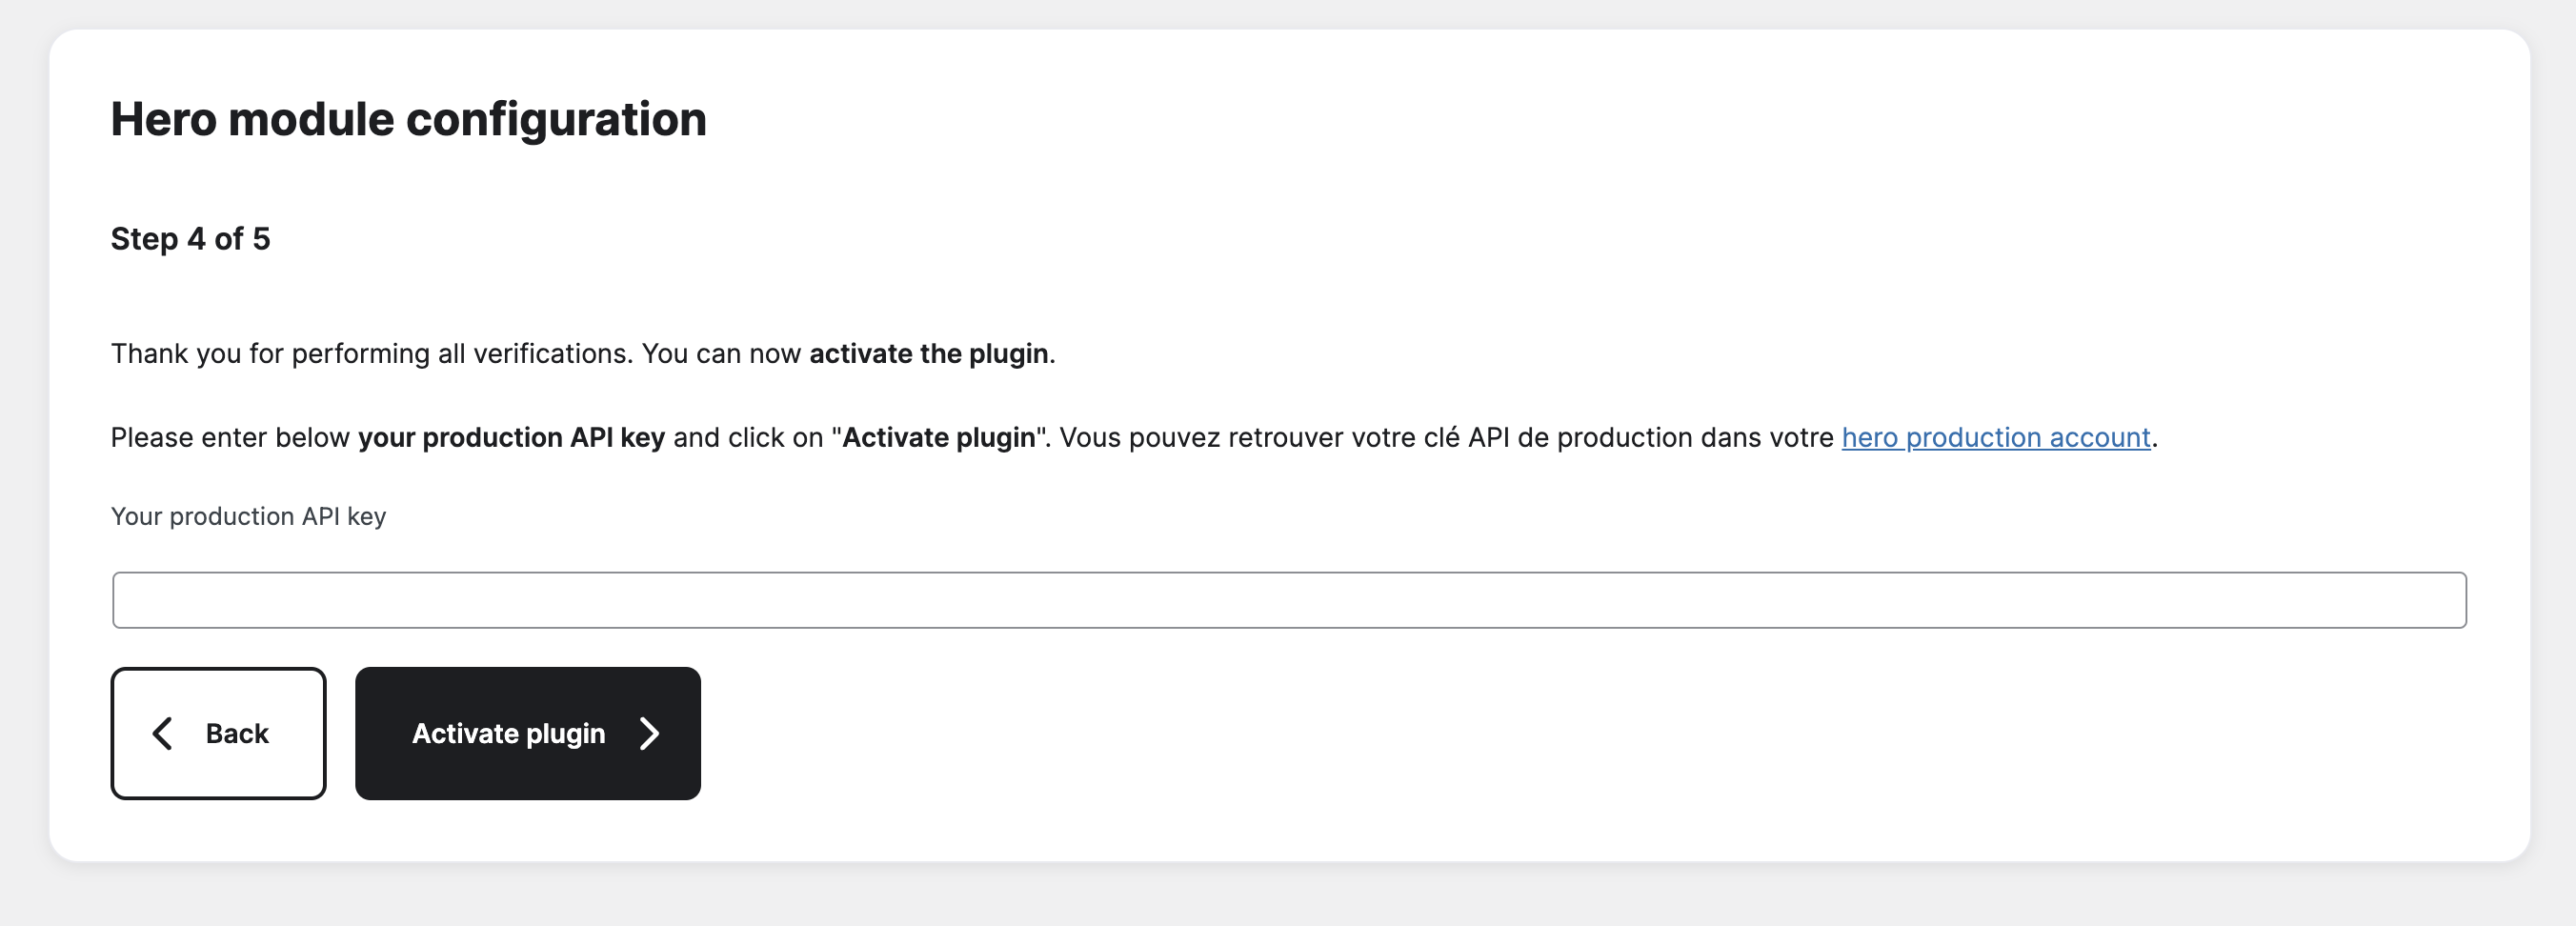
Step 5: Production Setup
-
On Step 4, you need to paste your Production API key, which you will be able to find in Hero's admin panel, go to the Hero's website and log into your account: https://onboarding.heropay.eu/signin?flow=registered&country=FR
Getting your Production API Key (expand for details)
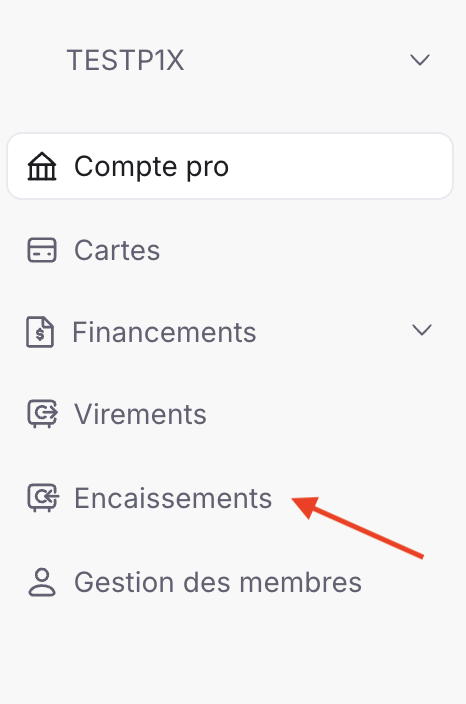
- Once you log in, click on the Encaissements
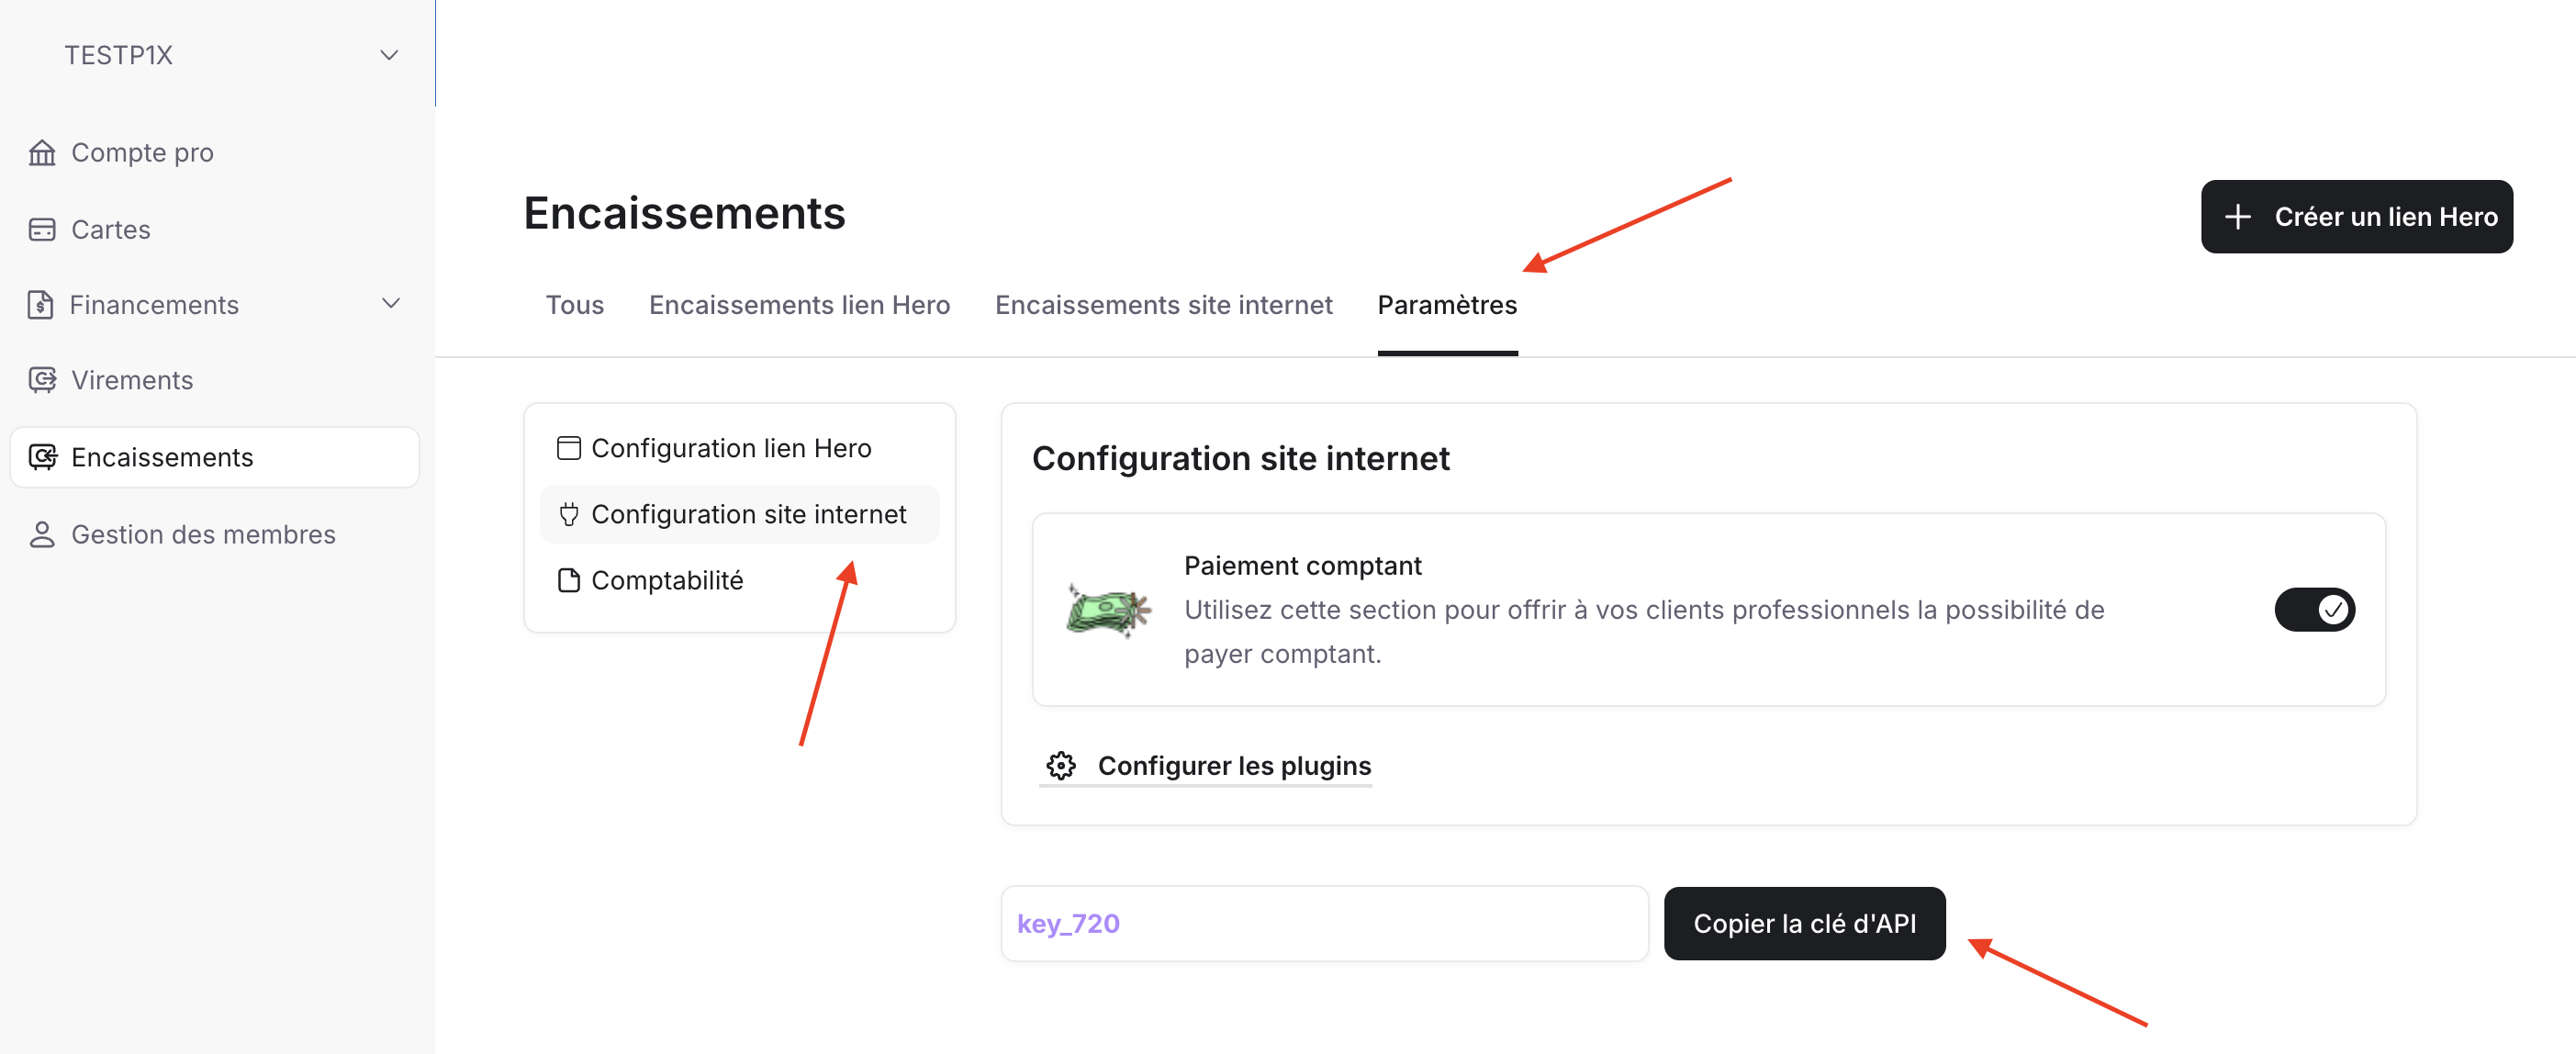
- After you arrive on the Encaissements page, click on Paramètres, next click on Configuration site Internet and copy your API key by clicking the button Copier la clé API
- After copying the API key, paste it in this field in your WooCommerce Admin Page and click on Activate the module

- Once you log in, click on the Encaissements
-
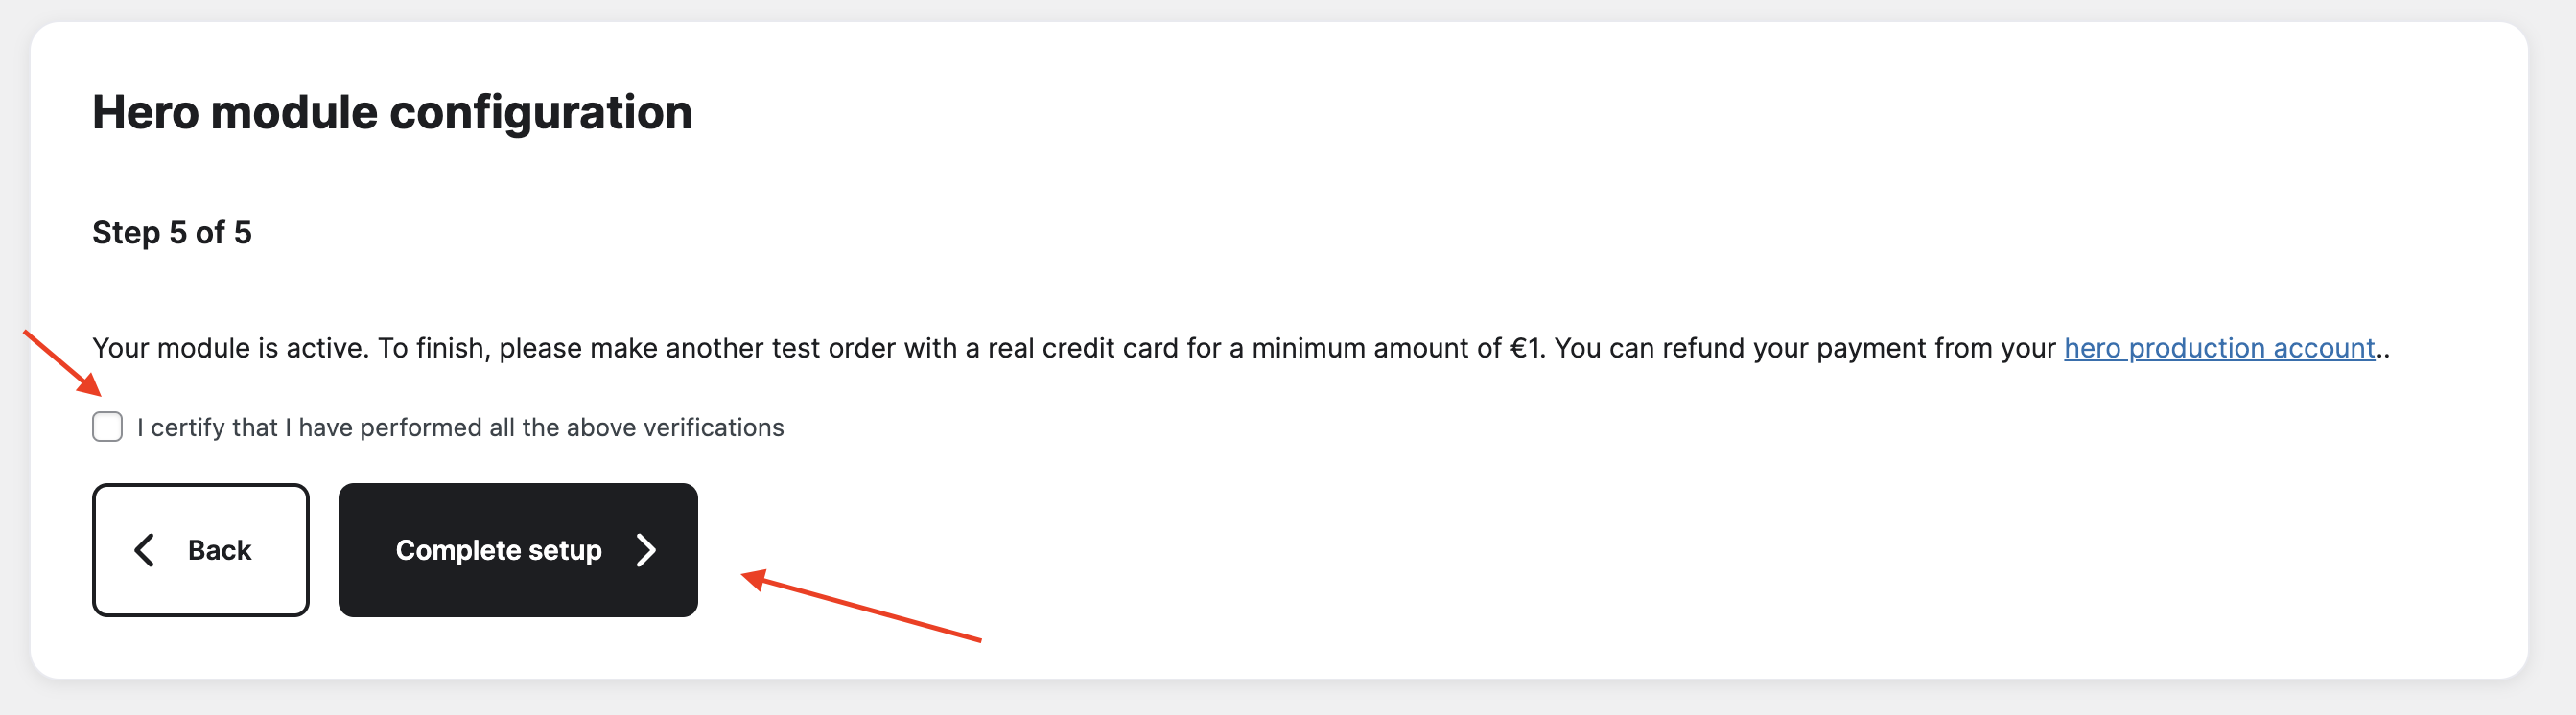
On Step 5 tick the box - I certify that I have performed all the above verifications and click on Complete Setup
Step 6: Configure Payment Display
-
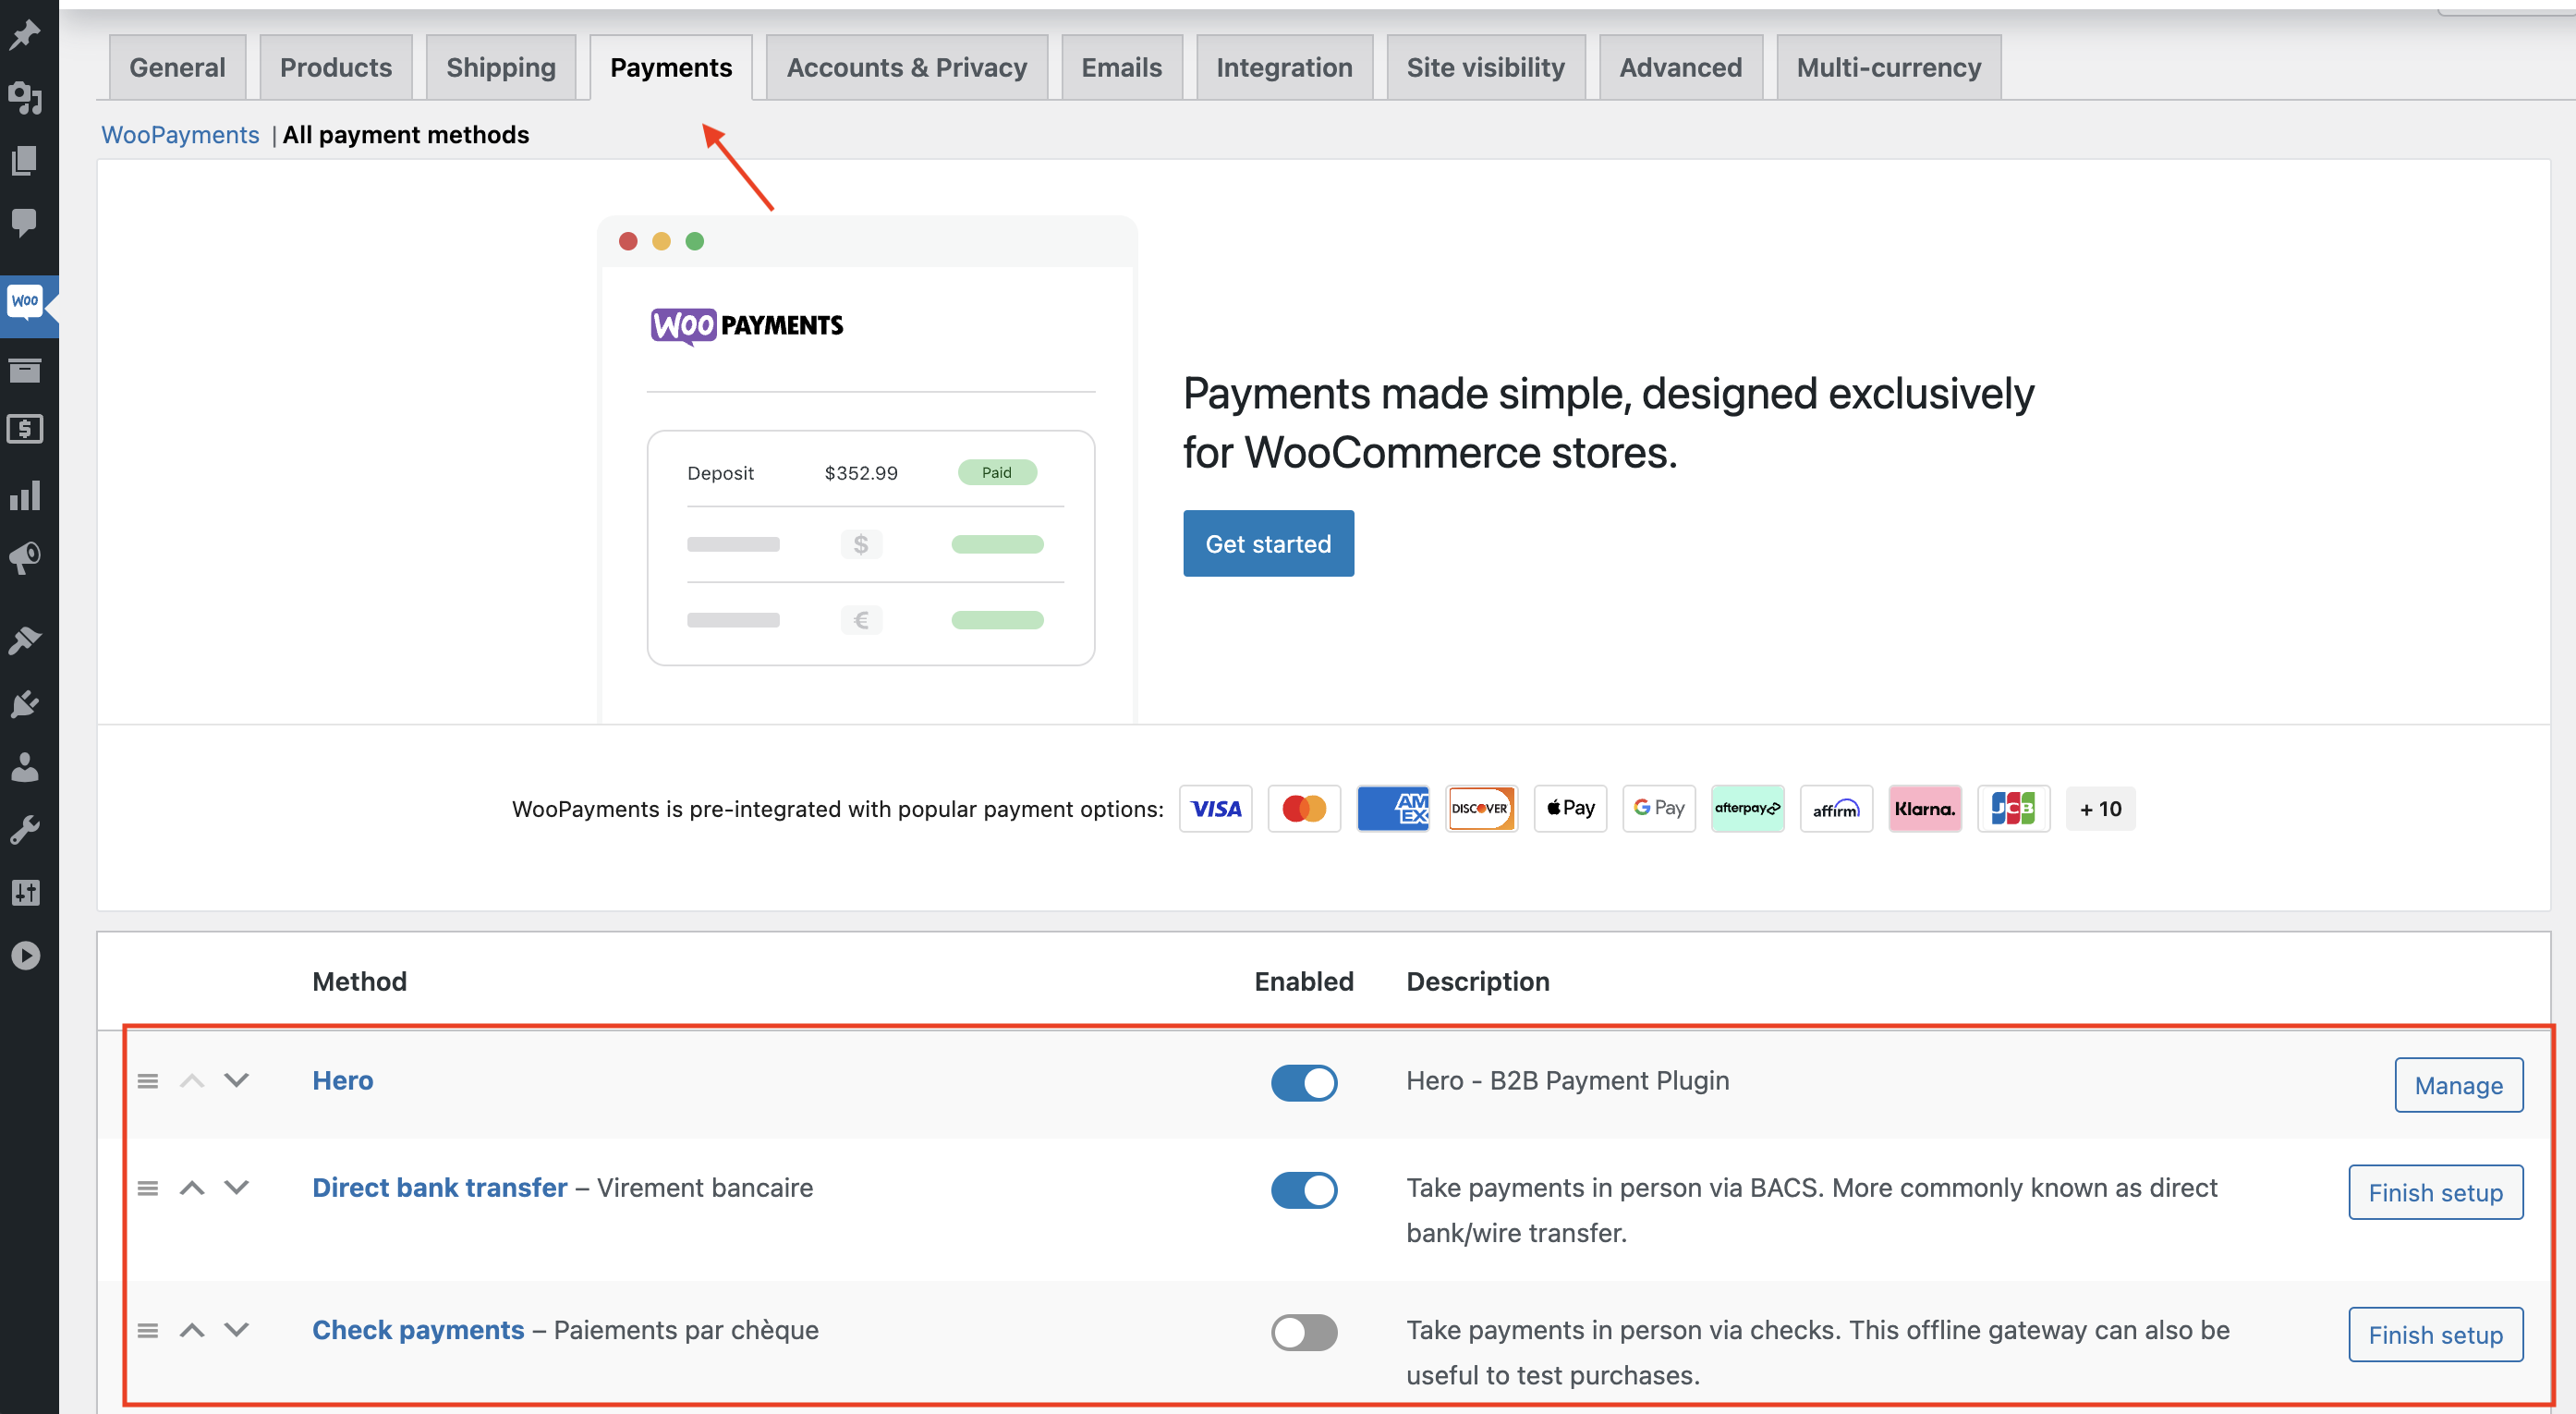
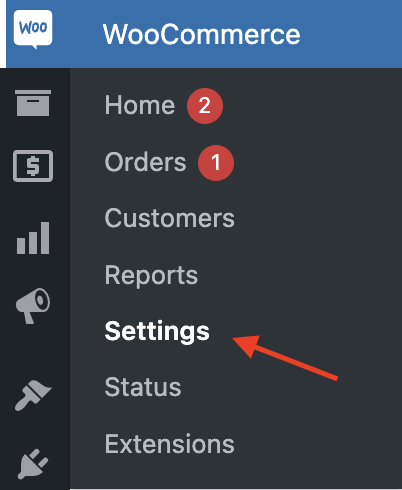
Click on Woocommere icon and then click on Settings
-
After you go to Settings, click on Payments to change the desired position of Hero Payment Method on the payment page